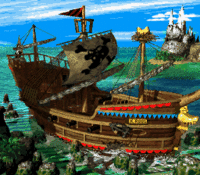
Gangplank Galleon 102
 | |
| Game | Donkey Kong Country 2 |
|---|---|
| World name | Gangplank Galleon |
| Optimal time | 6:40~6:50 |
| Previous world | None |
| Next world | Crocodile Cauldron |
Pirate Panic
Difficulty: 2/10
Notes
- As seen in the 2nd bonus, changing directions with an airborne Rambi will stop your jump and quickly send you back down. Be swift on the initial charge as you can bounce off the 2nd rat instead of charging through it.
- The charged jump with Rambi at 1:00 is very tight. It is recommended for newer players to take a step back to have a bigger window for the takeoff.
Mainbrace Mayhem
Difficulty: 7/10
Notes
- This is a very complete level, and by far the hardest stage of World 1 to optimize in this category.
- Rolling through the rat at 0:32 is purely a visual cue for the team throw that follows.
- The barrel throw at 0:48 can be done in such a way that will kill all 5 Klingers (as seen in Riz's video). However, this method is much more consistent.
- A 2-1 jump can be performed at 0:58 to gain the required height to enter the bonus barrel.
- A goal swap at the end of this stage is ideal if you plan on doing a safer route.
Gangplank Galley
Difficulty:
- 4/10 (with Jedi Boi)
- 2/10 (without Jedi Boi, see below)
Notes
- Jedi Boi (which is basically 2 Team Throw Super Jumps in a row) can be seen at 0:07. You can perform it again after the first bonus in case you missed grabbing the DK coin on your first attempt.
- The first bonus in this stage is the only additional instance of RNG in this category over Any%, and it's around 2-3 seconds of variance at most.
- An alternate and safer route can be used (as seen in Riz's video) to completely avoid Jedi Boi.
Lockjaw's Locker
Difficulty: 5/10
Notes
- The Luckjaw jump at 0:09 is a bit easier to do with Diddy, but can be much more punishing due to how the camera scrolls on version 1.0 (you will end up inside the Klomp's hitbox instead of bouncing on it, taking damage as a result). Knowing how to react on failure is an asset.
- At 0:38, you need to crouch and hold down once you trigger the water raise. Pressing B afterwards will bring you atop of the water instantly.
- This stage is routed with a revisit so that you can perform a Kremcoin Grab Exit in the bonus. Simply press start, then select (as you would normally do to exit a completed stage) as you are about to collect the Kremcoin. Doing so properly will skip the cutscene you have to watch after collecting a prize from a bonus.
Topsail Trouble
Difficulty: 4/10
Notes
- The rope dismount at 0:16 can be tricky, but can also be easily avoided by jumping over the bee.