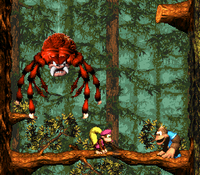
Arich's Ambush
 | |
| Game | Donkey Kong Country 3 |
|---|---|
| World name | Kremwood Forest |
| Level name | Bobbing Barrel Brawl |
| Previous level |
Bobbing Barrel Brawl Bobbing Barrel Brawl 103 Bobbing Barrel Brawl Warpless |
| Next level |
Fire-Ball Frenzy Fire-Ball Frenzy 103 Kremwood Forest to Krematoa |
Difficulty:
- Safe: 2/10
- Optimal: 9/10
- Optimal variation: 7/10
- Optimal alternative: 10/10
Any%
Safe
Notes:
- Don't forget to drop the barrel on the ground for Arich's last pattern (holding Y -> Hold Down -> Release Y)
Optimal
Notes:
- To properly achieve hits on Arich you'll want to fall straight down off the platform above so you won't clash your barrel with legs.
- For the second hit you'll need to jump after falling to land the hit properly on Arich.
- For the third and fourth hits you won't need to jump out of your fall but just fall and throw before landing.
- Grabbing the patch from underneath is the most optimal, to achieve this it's best to try and jump during the sound of him falling.
- Arich tends to have irregular patterns at times even with similar or same movement, so you'll have to adjust how you throw but sometimes you can't help the inevitable World 2 reset with this boss.
- to land hits 3 and 4 consistently drop straight down as normal. Start barrel throw as soon as Kiddies bottom hand crosses the boundary of the tree branch indicated
Optimal variation
Notes:
- This variation is barely slower than optimal, but can be more safe / consistent
- Falling immediately, before the barrel is fully picked up, causes Kiddy to drop in this way
- 2nd hit - Drop to the lower branch
- 3rd hit - Drop to the floor
Optimal alternative
Notes:
Saves about 2 seconds over Optimal but is very risky, especially the 3rd hit. Be prepared to potentially reset or switch to a Dixie backup
1st Hit
- Hold B while entering the level to buffer a jump
- Buffer B + Y when landing on the branch, hold left to jump onto Arich's leg
- This jump is precise and Kiddy may take damage
- Pick up the barrel and quickly slide right and jump off
- Position Kiddy on the middle of the branch, quickly turn and throw upwards
- (see cue video below)
3rd Hit
- Arich and Kiddy’s position will vary slightly depending on the 2nd hit and team-throw
- Because of this, try to attack Arich for the 2nd time and team-throw as consistently as possible
- If the 3rd hit is missed, adjust accordingly for another chance
- If the barrel breaks on Arich's legs - move left
- If the barrel breaks on Arich's face - move right
1st Hit Cue
1st Hit Backup
Notes:
- Hug the right wall
- Short hop
- Full hop
- At the full hop’s peak - turn and immediately throw
- After this, the fight continues as normal
Dixie backup
Notes:
- By doing that little hover at the top Arich will be baited into dropping down and instantly coming back up ending his spit ball phase.
- This is meant as a backup for when you lose kiddie but don't want to reset.

