Difference between revisions of "Barrel Bayou"
(removing dbj-unapproved edits) |
(fuck y'all) |
||
| Line 4: | Line 4: | ||
| world_name = [[Krem Quay]] | | world_name = [[Krem Quay]] | ||
| level_name = Barrel Bayou | | level_name = Barrel Bayou | ||
| − | | previous = [[ | + | | previous = [[Kleever's Kiln]] |
| next = [[Glimmer's Galleon]] | | next = [[Glimmer's Galleon]] | ||
}} | }} | ||
| − | Difficulty: 5/10 | + | Difficulty: |
| + | *Safe: 3/10 | ||
| + | *Optimal: 5/10 | ||
| + | |||
==Any%== | ==Any%== | ||
| + | ===Safe==={{#ev:youtube|RO6BaOp7OOU|560||http://www.youtube.com/watch?v=RO6BaOp7OOU}} | ||
| + | '''Notes''' | ||
| + | *It is slightly faster to jump off Rambi, compared to bringing him past the No-Rambi zone. Make sure to hold Y during the entire process, so that after the dismount, your first roll can be a fast one. | ||
| + | *The team throw into the barrel at 0:40 seconds may seem slower, but it "stores" a super jump for a skip at the end of the level. | ||
| + | **At 0:50, you want to run yourself intentionally into the Kloak, giving you a [http://cronikeys.com/dkc2/index.php?title=Tricks#Damage_Boosting Damage Boost] across the final section. | ||
| + | |||
| + | |||
| + | <div class="toccolours mw-collapsible mw-collapsed" style="width:600px"> | ||
| + | '''TWIG'S TUTORIAL''' | ||
| + | <div class="mw-collapsible-content"> | ||
| + | {{#ev:youtube|PmdCgMuvXU8|560||http://www.youtube.com/watch?v=PmdCgMuvXU8}} | ||
| + | </div> | ||
| + | </div> | ||
| + | |||
| + | |||
| + | |||
| + | ===Optimal==={{#ev:youtube|uBnK_0QaLSY|560||http://www.youtube.com/watch?v=uBnK_0QaLSY}} | ||
| + | '''Additions''' | ||
| + | *At 0:07, roll across the section, instead of jumping over it. Make sure to release Y to not pick up the barrel (Saves about .25s). | ||
| + | *At 0:09, use the barrel to shoot yourself to the croc (Saves about .25s). | ||
| + | *At 0:10, move yourself as little as possible to the left after landing on Rambi. | ||
| + | *At 0:31, roll under the barrels instead of jumping over (Saves minimal time, but can lose time if poorly executed). | ||
| + | *Before the end, use the barrel to shoot yourself right (Can save minimal time if executed properly, but it averages the same speed. It mostly looks awesome). This also applies to the very first blast barrel of the stage. | ||
| + | |||
| + | |||
| + | <div class="toccolours mw-collapsible mw-collapsed" style="width:600px"> | ||
| + | '''MORE STRATS''' | ||
| + | <div class="mw-collapsible-content">{{#ev:youtube|of4JT_xRQfA|560||http://www.youtube.com/watch?v=of4JT_xRQfA}} | ||
| + | *The Rambi jump is a bit precise, and can result in death, or losing Rambi if you do it very late. However, after a bit of practice it is pretty consistent, and on failure will only make you fall to the barrel below (Saves about .25s, but loses .15s on a failed attempt). | ||
| + | *The Klobbers can be avoided completely. This will mostly happen randomly during runs where you jumped a bit too late, so just know that it does not lose (or save) any time. | ||
| + | </div> | ||
| + | </div> | ||
| − | |||
| − | |||
| − | |||
| − | |||
| − | |||
| − | |||
| − | |||
==102%== | ==102%== | ||
Revision as of 22:37, 11 June 2014
 | |
| Game | Donkey Kong Country 2 |
|---|---|
| World name | Krem Quay |
| Level name | Barrel Bayou |
| Previous level | Kleever's Kiln |
| Next level | Glimmer's Galleon |
Difficulty:
- Safe: 3/10
- Optimal: 5/10
Any%
===Safe===
Notes
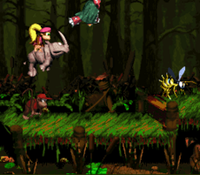
- It is slightly faster to jump off Rambi, compared to bringing him past the No-Rambi zone. Make sure to hold Y during the entire process, so that after the dismount, your first roll can be a fast one.
- The team throw into the barrel at 0:40 seconds may seem slower, but it "stores" a super jump for a skip at the end of the level.
- At 0:50, you want to run yourself intentionally into the Kloak, giving you a Damage Boost across the final section.
TWIG'S TUTORIAL
===Optimal===
Additions
- At 0:07, roll across the section, instead of jumping over it. Make sure to release Y to not pick up the barrel (Saves about .25s).
- At 0:09, use the barrel to shoot yourself to the croc (Saves about .25s).
- At 0:10, move yourself as little as possible to the left after landing on Rambi.
- At 0:31, roll under the barrels instead of jumping over (Saves minimal time, but can lose time if poorly executed).
- Before the end, use the barrel to shoot yourself right (Can save minimal time if executed properly, but it averages the same speed. It mostly looks awesome). This also applies to the very first blast barrel of the stage.
MORE STRATS
- The Rambi jump is a bit precise, and can result in death, or losing Rambi if you do it very late. However, after a bit of practice it is pretty consistent, and on failure will only make you fall to the barrel below (Saves about .25s, but loses .15s on a failed attempt).
- The Klobbers can be avoided completely. This will mostly happen randomly during runs where you jumped a bit too late, so just know that it does not lose (or save) any time.