Difference between revisions of "Belcha's Barn"
m |
|||
| (17 intermediate revisions by 8 users not shown) | |||
| Line 5: | Line 5: | ||
| level_name = Belcha's Barn | | level_name = Belcha's Barn | ||
| previous = [[Murky Mill]] | | previous = [[Murky Mill]] | ||
| − | | next = [[ | + | | next = [[Barrel Shield Bust-Up]] |
}} | }} | ||
| − | Difficulty: 4/10 | + | Difficulty: |
| − | + | *Safe: 3/10 | |
| + | *Optimal: 4/10 | ||
| + | *Optimal alternative: 9/10 | ||
| + | |||
==Any%== | ==Any%== | ||
| + | ===Safe=== | ||
{{#ev:youtube|Qfhi2Mzfhj8|560||http://www.youtube.com/watch?v=Qfhi2Mzfhj8}} | {{#ev:youtube|Qfhi2Mzfhj8|560||http://www.youtube.com/watch?v=Qfhi2Mzfhj8}} | ||
Notes: | Notes: | ||
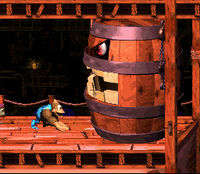
*If you time yourself right, you can just jump to Belcha's mouth and it will drop instantly in. | *If you time yourself right, you can just jump to Belcha's mouth and it will drop instantly in. | ||
| − | * | + | *This video waits for Belcha to land which loses around a second |
| − | == | + | *On 1.0 you will save .3s on the ending transition |
| − | {{#ev:youtube| | + | |
| + | |||
| + | ===Optimal=== | ||
| + | {{#ev:youtube|GPcDqMPi81E|560||https://www.youtube.com/watch?v=GPcDqMPi81E}} | ||
Notes: | Notes: | ||
| − | *This is | + | *This video demonstrates getting the optimal second feed, which is quite tight, and will either result in a softlock or a reset if failed. |
| + | *An un-optimal coin grab is a bigger time sink than it seems. Grab the coin ASAP, and as left most as possible. | ||
| + | |||
| + | ===Optimal alternative=== | ||
| + | {{#ev:youtube|iL_OhB_Nsnw|560||https://youtu.be/iL_OhB_Nsnw}} | ||
| + | Notes: | ||
| + | *To prevent Belcha from hopping after the second feed, you need to feed the bug to him as soon as possible. | ||
| + | *This trick is not recommended unless you can pull it off consistently. | ||
| + | |||
| + | ===Softlock Backup=== | ||
| + | {{#ev:youtube|aFxaQE5jwEA|560||https://youtu.be/aFxaQE5jwEA}} | ||
| + | Notes: | ||
| + | *You must hold left + y the whole time. | ||
[[Category:Murky Mill]] | [[Category:Murky Mill]] | ||
[[Category:Lake Orangatanga]] | [[Category:Lake Orangatanga]] | ||
Revision as of 08:35, 20 August 2019
 | |
| Game | Donkey Kong Country 3 |
|---|---|
| World name | Lake Orangatanga |
| Level name | Belcha's Barn |
| Previous level | Murky Mill |
| Next level | Barrel Shield Bust-Up |
Difficulty:
- Safe: 3/10
- Optimal: 4/10
- Optimal alternative: 9/10
Any%
Safe
Notes:
- If you time yourself right, you can just jump to Belcha's mouth and it will drop instantly in.
- This video waits for Belcha to land which loses around a second
- On 1.0 you will save .3s on the ending transition
Optimal
Notes:
- This video demonstrates getting the optimal second feed, which is quite tight, and will either result in a softlock or a reset if failed.
- An un-optimal coin grab is a bigger time sink than it seems. Grab the coin ASAP, and as left most as possible.
Optimal alternative
Notes:
- To prevent Belcha from hopping after the second feed, you need to feed the bug to him as soon as possible.
- This trick is not recommended unless you can pull it off consistently.
Softlock Backup
Notes:
- You must hold left + y the whole time.