Difference between revisions of "Blazing Bazukas 103"
| Line 17: | Line 17: | ||
*The jump over the barrel at 1:15 is a lot easier than it looks and is very consistent. | *The jump over the barrel at 1:15 is a lot easier than it looks and is very consistent. | ||
*In the 2nd bonus, getting the first cycle shot is very precise and can easily cause you to fail the bonus by messing up. Waiting for the next cycle is totally safe and loses roughly only 1 second. | *In the 2nd bonus, getting the first cycle shot is very precise and can easily cause you to fail the bonus by messing up. Waiting for the next cycle is totally safe and loses roughly only 1 second. | ||
| − | *For the roll at 1:58, you have the possibility to get "U Roped", a glitch where Dixie grabs an invisible rope below the real one, and promptly dies to the TNT barrel. To avoid this, let yourself roll far enough under the roll before jumping. A good cue for a safe jump is when Dixie is below the bananas. | + | *For the roll at 1:58, you have the possibility to get "U Roped", a glitch where Dixie grabs an invisible rope below the real one, and promptly dies to the TNT barrel as seen in the video below. To avoid this, let yourself roll far enough under the roll before jumping. A good cue for a safe jump is when Dixie is below the bananas. |
| + | |||
| + | <div class="toccolours mw-collapsible mw-collapsed" style="width:600px"> | ||
| + | '''U Rope''' | ||
| + | <div class="mw-collapsible-content"> | ||
| + | {{#ev:youtube|_D2Eyr287lE|560||https://youtu.be/_D2Eyr287lE}} | ||
| + | '''Notes''' | ||
| + | *When you jump the same frame that you pick up the banana, Dixie will hang on the banana as if it were a rope. You will die if this happens. This is only possible on the American version. | ||
| + | </div> | ||
| + | </div> | ||
<div class="toccolours mw-collapsible mw-collapsed" style="width:600px"> | <div class="toccolours mw-collapsible mw-collapsed" style="width:600px"> | ||
| Line 23: | Line 32: | ||
<div class="mw-collapsible-content"> | <div class="mw-collapsible-content"> | ||
{{#ev:youtube|wMO1x0n0KZ0|560||https://www.youtube.com/watch?v=wMO1x0n0KZ0}} | {{#ev:youtube|wMO1x0n0KZ0|560||https://www.youtube.com/watch?v=wMO1x0n0KZ0}} | ||
| + | '''Notes''' | ||
| + | *Also displays an alternative ending that's slightly faster. Shoot out of the barrel as soon as it's facing up. If it doesn't work the first try, don't try again until the TNT barrel is out of the way. | ||
</div> | </div> | ||
</div> | </div> | ||
Revision as of 22:29, 16 April 2020
 | |
| Game | Donkey Kong Country 3 |
|---|---|
| World name | Mekanos |
| Level name | Blazing Bazukas |
| Previous level | Ripsaw Rage 103 |
| Next level | Low-G Labyrinth 103 |
Optimal
Notes
- Bear coins count: 31
- You can Just Defend the Krimp at 0:11, which saves 0.3s.
- When collecting the bear coin at 0:20, make sure you do a full jump or else your glide won't get you in the barrel after.
- When walking down the hallway toward the 1st bonus, it is advised to hesitate slightly before walking toward the explosions, as their hitbox lingers for a bit and can kill you if you go too fast.
- At 1:09, make use of an Animal Buddy Damage Boost to jump over the Bazuka more quickly.
- The jump over the barrel at 1:15 is a lot easier than it looks and is very consistent.
- In the 2nd bonus, getting the first cycle shot is very precise and can easily cause you to fail the bonus by messing up. Waiting for the next cycle is totally safe and loses roughly only 1 second.
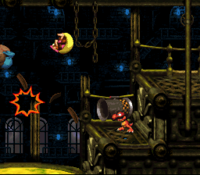
- For the roll at 1:58, you have the possibility to get "U Roped", a glitch where Dixie grabs an invisible rope below the real one, and promptly dies to the TNT barrel as seen in the video below. To avoid this, let yourself roll far enough under the roll before jumping. A good cue for a safe jump is when Dixie is below the bananas.
U Rope
Notes
- When you jump the same frame that you pick up the banana, Dixie will hang on the banana as if it were a rope. You will die if this happens. This is only possible on the American version.
Safe U Rope Alternative
Notes
- Also displays an alternative ending that's slightly faster. Shoot out of the barrel as soon as it's facing up. If it doesn't work the first try, don't try again until the TNT barrel is out of the way.