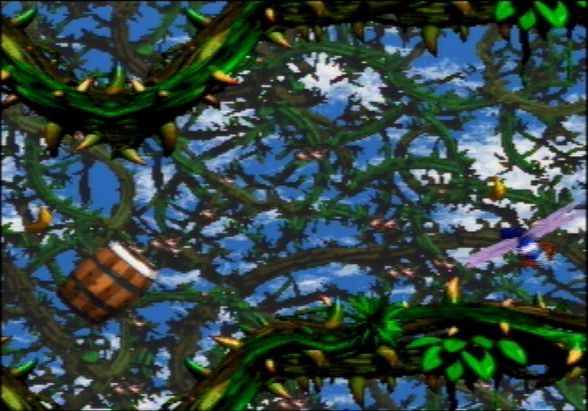
Difference between revisions of "Bramble Blast"
Cryptonberry (talk | contribs) m (→Optimal) |
m |
||
| (4 intermediate revisions by 2 users not shown) | |||
| Line 8: | Line 8: | ||
}} | }} | ||
Difficulty: | Difficulty: | ||
| − | *No Vine Clip: | + | *No Vine Clip: 6/10 |
*Vine Clip: 7/10 | *Vine Clip: 7/10 | ||
| Line 18: | Line 18: | ||
*At 0:20, perform the double quickshot skip. | *At 0:20, perform the double quickshot skip. | ||
**Make sure to hold Left as you shoot into the brambles. Start holding Right as you get hit to not land in the barrel above. | **Make sure to hold Left as you shoot into the brambles. Start holding Right as you get hit to not land in the barrel above. | ||
| − | *If you do not want to | + | *If you do not want to perform Vine Clip, watch Riz's video below (More Strats section) for a safe alternative. |
| − | |||
<div class="toccolours mw-collapsible mw-collapsed" style="width:600px"> | <div class="toccolours mw-collapsible mw-collapsed" style="width:600px"> | ||
| Line 28: | Line 27: | ||
</div> | </div> | ||
| − | <div class="toccolours mw-collapsible mw-collapsed" style="width: | + | <div class="toccolours mw-collapsible mw-collapsed" style="width:600px"> |
'''VINE CLIP TUTORIAL''' | '''VINE CLIP TUTORIAL''' | ||
<div class="mw-collapsible-content"> | <div class="mw-collapsible-content"> | ||
| − | [[File:vc1.jpg]] | + | [[File:vc1.jpg|588px]] |
*This is where you want to land from launching from the up barrel. | *This is where you want to land from launching from the up barrel. | ||
| − | [[File:vc2.jpg]] | + | [[File:vc2.jpg|588px]] |
*Notice that this dot triggers the Klampon to load. | *Notice that this dot triggers the Klampon to load. | ||
| − | [[File:vc3.jpg]] | + | [[File:vc3.jpg|588px]] |
*So the idea is, from landing on the platform, start a roll, and once Diddy is right on the dot, cancel your roll into a team-up. | *So the idea is, from landing on the platform, start a roll, and once Diddy is right on the dot, cancel your roll into a team-up. | ||
| − | [[File:vc4.jpg]] | + | [[File:vc4.jpg|588px]] |
| − | *The goal is to do a [[Tricks#Team_Throw_Super_Jumps | Team Throw Super Jump]] into a specific location in the bramble where you can team throw. | + | *The goal is to do a [[DKC2 Tricks#Team_Throw_Super_Jumps | Team Throw Super Jump]] into a specific location in the bramble where you can team throw. |
*In order to maximize your vertical distance, you want Dixie to hit the Klampon '''immediately''' as it's loaded on the screen. | *In order to maximize your vertical distance, you want Dixie to hit the Klampon '''immediately''' as it's loaded on the screen. | ||
*The more of the Klampon that's on the screen, the harder it is to get maximum height from the super jump. | *The more of the Klampon that's on the screen, the harder it is to get maximum height from the super jump. | ||
| − | [[File:vc5.jpg]] | + | [[File:vc5.jpg|588px]] |
*Throw Dixie and hold Y+B and Left. | *Throw Dixie and hold Y+B and Left. | ||
| − | [[File:vc6.jpg]] | + | [[File:vc6.jpg|588px]] |
*As you're traveling upwards, you want to aim for the thorn that the red arrow points to. | *As you're traveling upwards, you want to aim for the thorn that the red arrow points to. | ||
| − | [[File:vc7.jpg]] | + | [[File:vc7.jpg|588px]] |
*Make sure that you get as much height from your super jump before throwing. | *Make sure that you get as much height from your super jump before throwing. | ||
| − | [[File:vc8.jpg]] | + | [[File:vc8.jpg|588px]] |
*Throw and hope that you clip. If the throw misses, there are a couple of things that might have gone wrong | *Throw and hope that you clip. If the throw misses, there are a couple of things that might have gone wrong | ||
| Line 68: | Line 67: | ||
**You were too far left, resulting in Dixie falling down from the throw. This error might also be confused with not enough height. | **You were too far left, resulting in Dixie falling down from the throw. This error might also be confused with not enough height. | ||
| − | [[File:vc9.jpg]] | + | [[File:vc9.jpg|588px]] |
*Vine clip! | *Vine clip! | ||
| Line 75: | Line 74: | ||
</div> | </div> | ||
| − | <div class="toccolours mw-collapsible mw-collapsed" style="width: | + | <div class="toccolours mw-collapsible mw-collapsed" style="width:600px"> |
'''BACKUPS/MORE STRATS''' | '''BACKUPS/MORE STRATS''' | ||
<div class="mw-collapsible-content"> | <div class="mw-collapsible-content"> | ||
| Line 84: | Line 83: | ||
*The 3rd and 4th videos show a slower, but easier method to clip through the vines. | *The 3rd and 4th videos show a slower, but easier method to clip through the vines. | ||
*The final 3 three videos show various ways of doing the standard vine clip. The methods without a roll are slightly faster (last video is the fastest of the 3). | *The final 3 three videos show various ways of doing the standard vine clip. The methods without a roll are slightly faster (last video is the fastest of the 3). | ||
| − | |||
'''Dave Clip''' | '''Dave Clip''' | ||
{{#ev:youtube|dKcfGNt8ZOI|560||https://youtu.be/dKcfGNt8ZOI}} | {{#ev:youtube|dKcfGNt8ZOI|560||https://youtu.be/dKcfGNt8ZOI}} | ||
| − | '''Notes | + | '''Notes''' |
*Faster than teamthrowing/damageboosting up but slightly more difficult. | *Faster than teamthrowing/damageboosting up but slightly more difficult. | ||
*You can go straight onto the flutter from this setup but it risks death. | *You can go straight onto the flutter from this setup but it risks death. | ||
| + | '''Dave Clip fast version''' | ||
| + | {{#ev:youtube|UTpH8AhSC8w|560||https://youtu.be/UTpH8AhSC8w}} | ||
| + | *After the teamthrow through, hold left then right to land up the bramble | ||
| + | *to get past the barrel onto the flutter without dying jump as close to the barrel as u can otherwise you will hit the ceiling. | ||
</div> | </div> | ||
</div> | </div> | ||
Revision as of 20:34, 3 March 2019
 | |
| Game | Donkey Kong Country 2 |
|---|---|
| World name | Krem Quay |
| Level name | Bramble Blast |
| Previous level | Slime Climb |
| Next level | Kudgel's Kontest |
Difficulty:
- No Vine Clip: 6/10
- Vine Clip: 7/10
Any%
Optimal
Notes
- There are a total of 4 quickshots in the level. A quickshot is when you shoot before the barrel changes direction. Quickshots are 3 frames precise.
- At 0:20, perform the double quickshot skip.
- Make sure to hold Left as you shoot into the brambles. Start holding Right as you get hit to not land in the barrel above.
- If you do not want to perform Vine Clip, watch Riz's video below (More Strats section) for a safe alternative.
TWIG'S TUTORIAL
VINE CLIP TUTORIAL
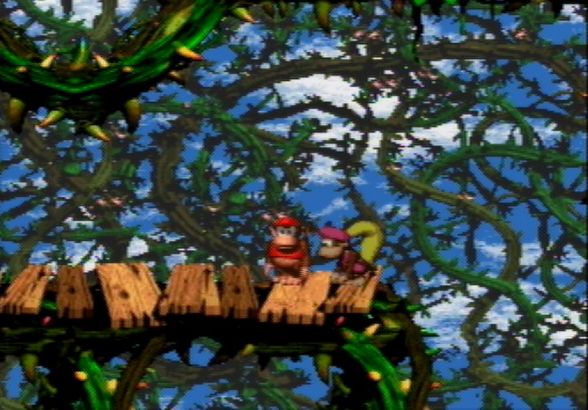
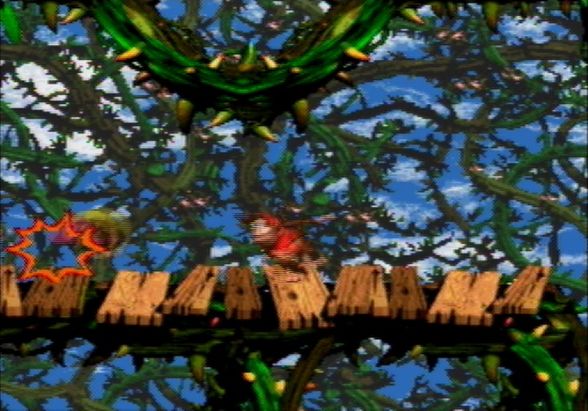
- This is where you want to land from launching from the up barrel.
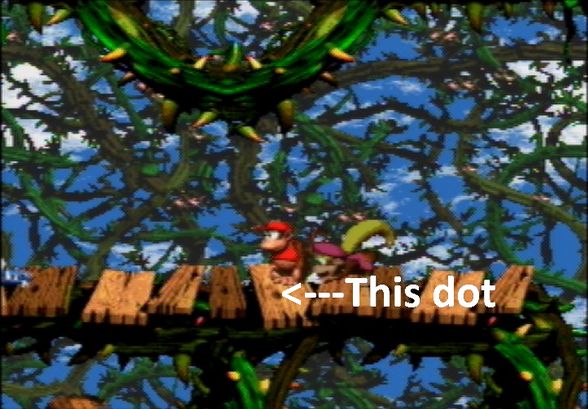
- Notice that this dot triggers the Klampon to load.
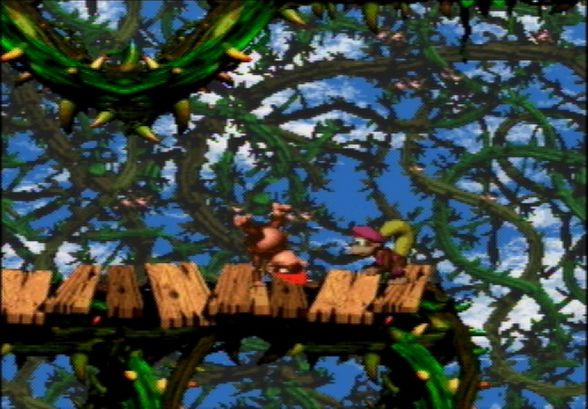
- So the idea is, from landing on the platform, start a roll, and once Diddy is right on the dot, cancel your roll into a team-up.
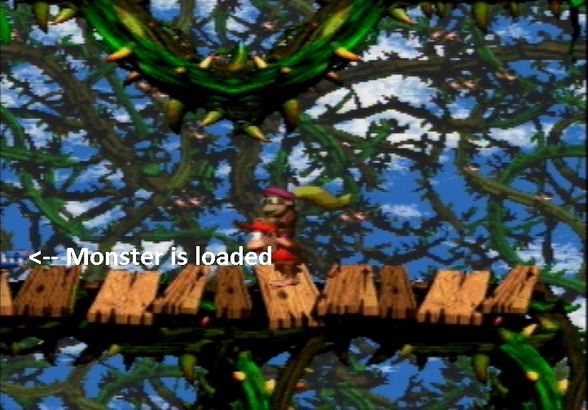
- The goal is to do a Team Throw Super Jump into a specific location in the bramble where you can team throw.
- In order to maximize your vertical distance, you want Dixie to hit the Klampon immediately as it's loaded on the screen.
- The more of the Klampon that's on the screen, the harder it is to get maximum height from the super jump.
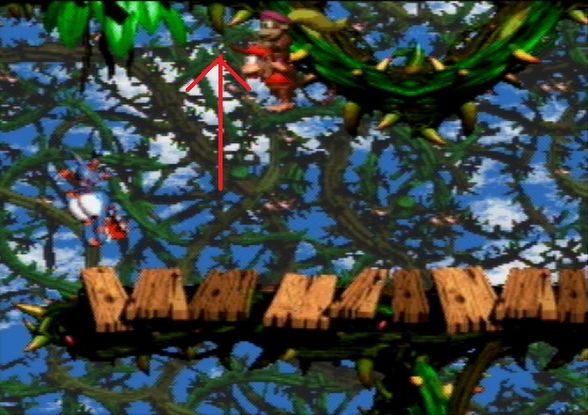
- Throw Dixie and hold Y+B and Left.
- As you're traveling upwards, you want to aim for the thorn that the red arrow points to.
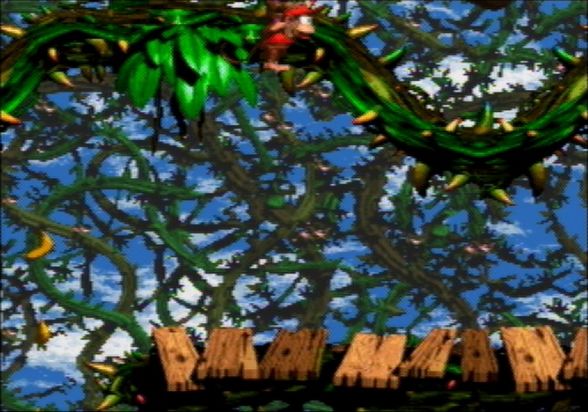
- Make sure that you get as much height from your super jump before throwing.
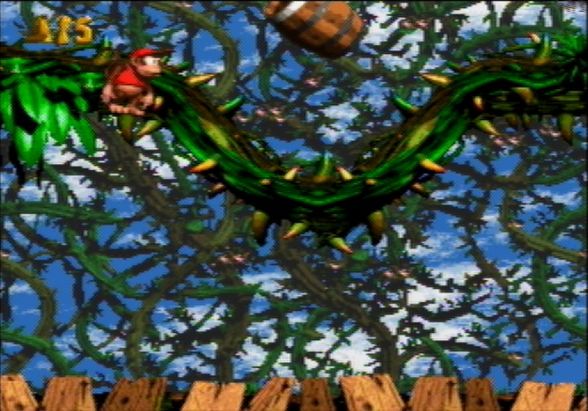
- Throw and hope that you clip. If the throw misses, there are a couple of things that might have gone wrong
- You weren't high enough vertically. This is the most common problem.
- You were too far right, resulting in a loss of a Kong. Sometimes you can be too far right and not lose a Kong.
- You were too far left, resulting in Dixie falling down from the throw. This error might also be confused with not enough height.
- Vine clip!
- If you can't clip, don't get discouraged. It is very precise with a window of a couple of pixels.
BACKUPS/MORE STRATS
Notes
- The first two videos are backups. Note that for the first one, you must do a team throw in order to store a super jump. That way, you can damage boost very high and reach the brambles above.
- Note that the team throw has to come right back to your Kong's shoulders. If not, your kong will not be in an airborne state and the damage boost won't get enough height.
- The 3rd and 4th videos show a slower, but easier method to clip through the vines.
- The final 3 three videos show various ways of doing the standard vine clip. The methods without a roll are slightly faster (last video is the fastest of the 3).
Dave Clip
Notes
- Faster than teamthrowing/damageboosting up but slightly more difficult.
- You can go straight onto the flutter from this setup but it risks death.
Dave Clip fast version
- After the teamthrow through, hold left then right to land up the bramble
- to get past the barrel onto the flutter without dying jump as close to the barrel as u can otherwise you will hit the ceiling.
