Difference between revisions of "Bramble Blast"
m (→Any%) |
(removing dbj-unapproved edits) |
||
| Line 8: | Line 8: | ||
}} | }} | ||
Difficulty: | Difficulty: | ||
| − | * | + | *Optimal Route: 8/10 (purely from Vine Clip) |
| − | * | + | *Standard Route: 3/10 |
| − | |||
==Any%== | ==Any%== | ||
| − | + | '''Optimal Route:'''{{#ev:youtube|Tn5y1R7tdMs|560||http://www.youtube.com/watch?v=Tn5y1R7tdMs}} | |
| − | ''' | + | '''Twig's Tutorial:'''{{#ev:youtube|3jesEMk-Bvw|560||http://www.youtube.com/watch?v=3jesEMk-Bvw}} |
| − | + | '''Riz (various vine clips and recovery methods):'''{{#ev:youtube|AW32ezOE8IU|560||http://www.youtube.com/watch?v=AW32ezOE8IU}} | |
| − | |||
| + | ==102%== | ||
| + | {{#ev:youtube|vpmZ1XWWQyQ|560||http://www.youtube.com/watch?v=vpmZ1XWWQyQ}} | ||
| − | + | ==Vine Clip Tutorial== | |
| − | + | {{#ev:youtube|rndwKnWHoSw|560||http://www.youtube.com/watch?v=rndwKnWHoSw}} | |
| − | |||
| − | {{#ev:youtube| | ||
| − | |||
| − | |||
| − | |||
| − | |||
| − | |||
| − | |||
| − | |||
[[File:vc1.jpg]] | [[File:vc1.jpg]] | ||
| − | *This is where you want to land from launching from the up barrel | + | *This is where you want to land from launching from the up barrel |
[[File:vc2.jpg]] | [[File:vc2.jpg]] | ||
| − | *Notice that this dot triggers the | + | *Notice that this dot triggers the Green Monster (GM) to load |
[[File:vc3.jpg]] | [[File:vc3.jpg]] | ||
| − | *So the idea is, from landing on the platform, start a roll, and once Diddy is right on the dot, cancel your | + | *So the idea is, from landing on the platform, start a cartwheel roll, and once Diddy is right on the dot, cancel your cartwheel into a team-up |
[[File:vc4.jpg]] | [[File:vc4.jpg]] | ||
| − | *The goal is to do a [http://cronikeys.com/dkc2/index.php?title=Tricks#Team_Throw_Super_Jumps Team Throw Super Jump] into a specific location in the bramble where you can team throw | + | *The goal is to do a [http://cronikeys.com/dkc2/index.php?title=Tricks#Team_Throw_Super_Jumps Team Throw Super Jump] into a specific location in the bramble where you can team throw |
| − | *In order to maximize your vertical distance, you want Dixie to hit the | + | *In order to maximize your vertical distance, you want Dixie to hit the GM '''immediately''' as it's loaded on the screen |
| − | *The more of the | + | *The more of the GM that's on the screen, the harder it is to get maximum height from the super jump |
[[File:vc5.jpg]] | [[File:vc5.jpg]] | ||
| − | *Throw Dixie and hold Y+B and Left | + | *Throw Dixie and hold Y+B and Up-Left |
[[File:vc6.jpg]] | [[File:vc6.jpg]] | ||
| − | *As | + | *As your traveling upwards, you want to aim for the thorn that the red arrow points to |
[[File:vc7.jpg]] | [[File:vc7.jpg]] | ||
| − | *Make sure that you get as much height from your super jump before throwing | + | *Make sure that you get as much height from your super jump before throwing |
[[File:vc8.jpg]] | [[File:vc8.jpg]] | ||
| − | *Throw and hope that you clip. If the throw misses, there are a couple of things that might have gone wrong | + | *Throw and hope that you clip. |
| − | + | *If the throw misses, there are a couple of things that might have gone wrong | |
| − | + | *You weren't high enough vertically. This is the most common problem. | |
| − | + | *You were too far right, resulting in a loss of a Kong. Sometimes you can be too far right and not lose a Kong. | |
| + | *You were too far left, resulting in Dixie falling down from the throw. This error might also be confused with not enough height. | ||
[[File:vc9.jpg]] | [[File:vc9.jpg]] | ||
*Vine clip! | *Vine clip! | ||
| − | *If you can't clip, don't get discouraged. | + | *If you can't clip, don't get discouraged. The clip is very precise with a window of a couple of pixels |
| − | |||
| − | |||
| − | |||
| − | |||
| − | |||
| − | |||
| − | |||
| − | |||
| − | |||
| − | |||
| − | |||
| − | |||
| − | |||
| − | |||
| − | |||
| − | |||
| − | |||
[[Category:Krem Quay]] | [[Category:Krem Quay]] | ||
[[Category:Level]] | [[Category:Level]] | ||
Revision as of 04:14, 7 June 2014
 | |
| Game | Donkey Kong Country 2 |
|---|---|
| World name | Krem Quay |
| Level name | Bramble Blast |
| Previous level | Slime Climb |
| Next level | Kudgel's Kontest |
Difficulty:
- Optimal Route: 8/10 (purely from Vine Clip)
- Standard Route: 3/10
Any%
Optimal Route:
Twig's Tutorial:
Riz (various vine clips and recovery methods):
102%
Vine Clip Tutorial
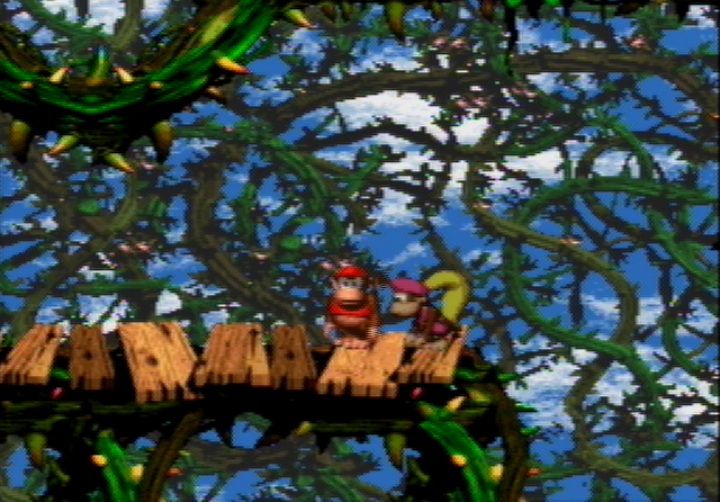
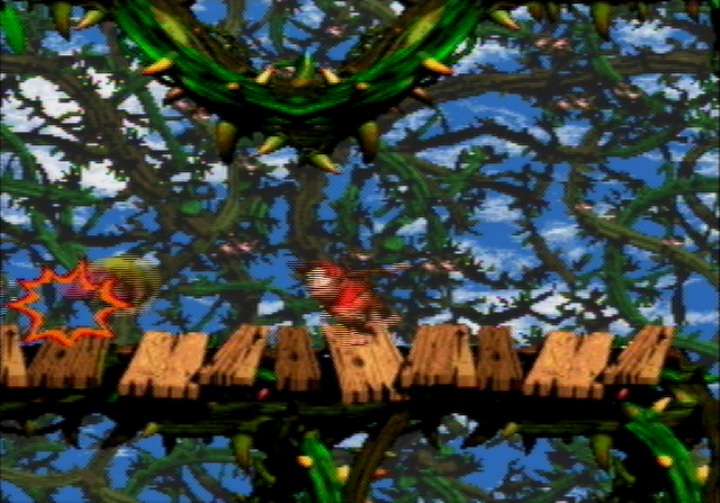
- This is where you want to land from launching from the up barrel
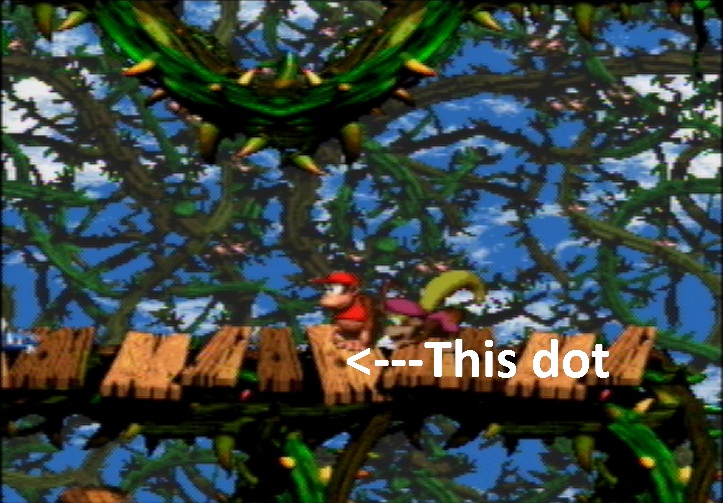
- Notice that this dot triggers the Green Monster (GM) to load
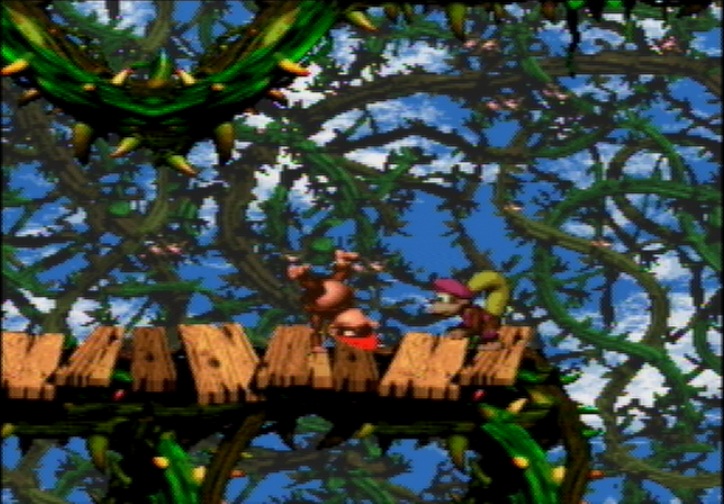
- So the idea is, from landing on the platform, start a cartwheel roll, and once Diddy is right on the dot, cancel your cartwheel into a team-up
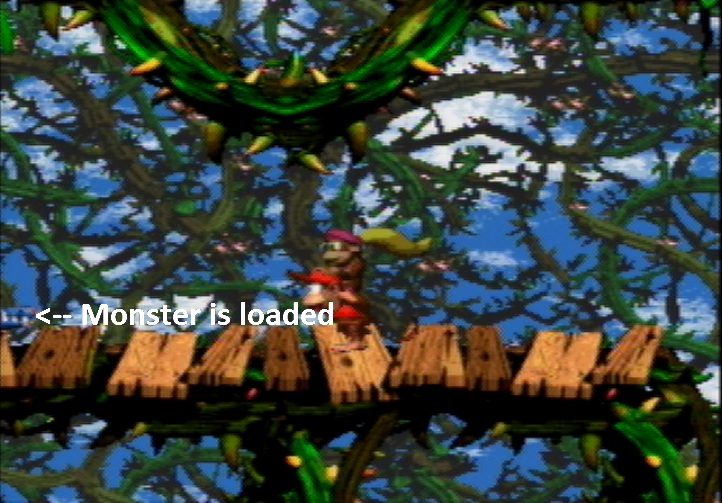
- The goal is to do a Team Throw Super Jump into a specific location in the bramble where you can team throw
- In order to maximize your vertical distance, you want Dixie to hit the GM immediately as it's loaded on the screen
- The more of the GM that's on the screen, the harder it is to get maximum height from the super jump
- Throw Dixie and hold Y+B and Up-Left
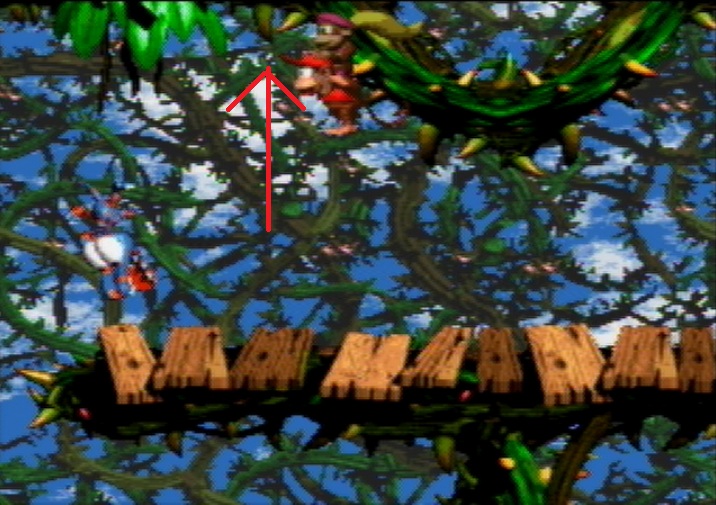
- As your traveling upwards, you want to aim for the thorn that the red arrow points to
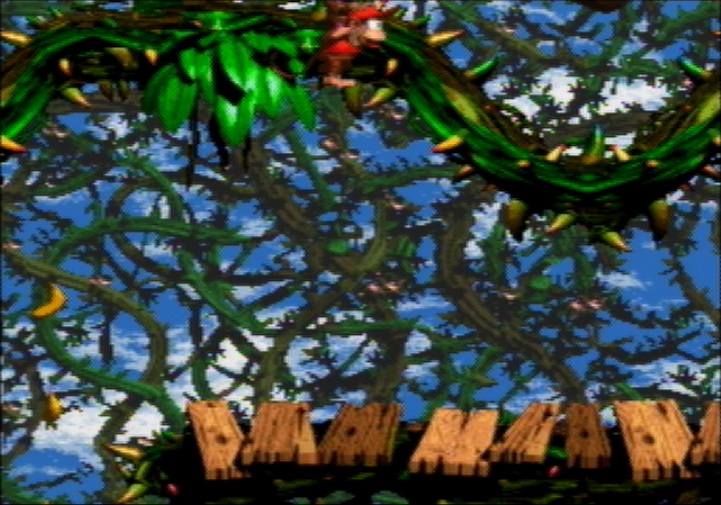
- Make sure that you get as much height from your super jump before throwing
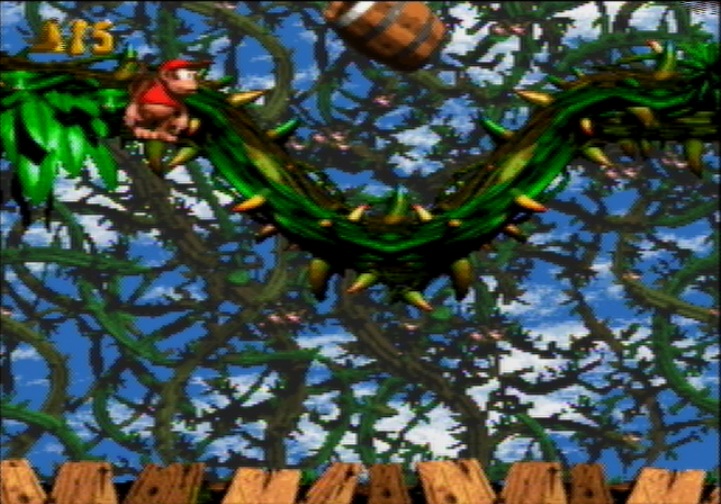
- Throw and hope that you clip.
- If the throw misses, there are a couple of things that might have gone wrong
- You weren't high enough vertically. This is the most common problem.
- You were too far right, resulting in a loss of a Kong. Sometimes you can be too far right and not lose a Kong.
- You were too far left, resulting in Dixie falling down from the throw. This error might also be confused with not enough height.
- Vine clip!
- If you can't clip, don't get discouraged. The clip is very precise with a window of a couple of pixels
