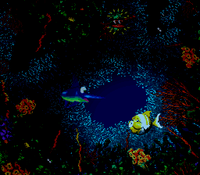
Floodlit Fish
 | |
| Game | Donkey Kong Country 3 |
|---|---|
| World name | Razor Ridge |
| Level name | Floodlit Fish |
| Previous level | Kong-Fused Cliffs |
| Next level | Pot Hole Panic |
Difficulty: 5/10
103%: 6/10
Any%
Notes:
- You won't use any light fishes since it wastes time, so get used to this dark ambiance.
- Just be careful for the spiky fishes.
103%
Notes:
- Bear coins count: 46
- Another dumb stage. Try to not get hit before the second bonus, as those lurchin can be quite the trolls.
Consistent 2nd half of Floodlit Fish, discovered by RaikouRider:
There are eight sets of Lurchins between the midway barrel and the second Bonus Barrel, many of them having spawn timers such that if you try to charge through at full speed, you will take a hit. Obviously taking a hit before the second bonus is very scary because of the speed at which the enemies move right above it. What you can do to manipulate these timers is slow down a little bit once the Lurchin pairs appear on the screen. Each cycle takes 20-30 frames, so we halve that for the ones that will kill you on a full speed charge because we want them open rather than closed. Releasing Down for about a quarter of a second seems to do the trick, but the timing window is pretty tight.
There are three pairs of Lurchins immediately after the Continue Barrel. Swim downward, then start stabbing with Enguarde as soon as the first pair spawns. The stab recoil will delay you just enough that you'll charge through the first pair. Mash Y to stab straight through the second pair, then briefly release Down to set up the third pair.
Once you see two pairs of Lurchins, if you hesitate a small amount, you'll be able to just swim around them. I tried finding a setup for them, but the exact timing varies with your position on the screen, and it would save at most one second--not worth it in a RTA run. For the second set of three pairs, charge through the first, and release Down briefly for the second and third sets. If you don't get caught on anything, you will be able to stab straight through the final pair guarding the second Bonus Barrel.
This trick is also very useful in Any%, other than going into the Bonus Barrel, of course.