Difference between revisions of "Gusty Glade"
m (23 revisions imported) |
m |
||
| (36 intermediate revisions by 7 users not shown) | |||
| Line 9: | Line 9: | ||
Difficulty: | Difficulty: | ||
*Safe: 4/10 | *Safe: 4/10 | ||
| − | *Optimal: | + | *Optimal: 7/10 |
==Any%== | ==Any%== | ||
| − | ===Safe==={{#ev:youtube| | + | ===Safe=== |
| + | {{#ev:youtube|bPi4UKy_tLM|560||https://www.youtube.com/watch?v=bPi4UKy_tLM}} | ||
'''Notes''' | '''Notes''' | ||
| − | *The wind can be used to your advantage in this level. An | + | *The wind can be used to your advantage in this level. An example being the 3 first pits of the level; by letting yourself fall a little longer, you can get a bigger wind push onto the platform. |
| − | + | ===Optimal=== | |
| − | ===Optimal==={{#ev:youtube| | + | {{#ev:youtube|0E8RObEPIkQ|560||https://www.youtube.com/watch?v=0E8RObEPIkQ}} |
'''Additions''' | '''Additions''' | ||
| − | *At 0: | + | *At 0:10, do not grab the chest before starting your roll (Saves ~.25s). |
| − | *At 0: | + | *At 0:16, roll over the pillars, instead of jumping on all of them. This is deceptively hard since the edges of the pillars can eat your rolls. |
| − | *At 0: | + | *At 0:31 is the Rolly Roll. After jumping to the ledge with the DK barrel, momentarily let go of Y and then press it again when you're close to the ledge (Saves ~.4s). |
**On failure, use either the DK barrel (if you rolled too early) or the chest (too late) to quickly dispatch a Kutlass and keep moving. | **On failure, use either the DK barrel (if you rolled too early) or the chest (too late) to quickly dispatch a Kutlass and keep moving. | ||
| − | + | *At 0:43, do not switch to Dixie for the final glide. Instead, team throw her into the barrel, allowing you to finish the stage with Diddy and to perform a [[DKC2 Tricks#Goal_Swapping | Goal Swap]] (Saves over 1s). | |
| − | *At 0: | ||
| − | |||
| − | |||
<div class="toccolours mw-collapsible mw-collapsed" style="width:600px"> | <div class="toccolours mw-collapsible mw-collapsed" style="width:600px"> | ||
'''MORE STRATS''' | '''MORE STRATS''' | ||
| − | <div class="mw-collapsible-content">{{#ev:youtube| | + | <div class="mw-collapsible-content"> |
| + | {{#ev:youtube|Lz25AO-d6FA|560||https://www.youtube.com/watch?v=Lz25AO-d6FA}} | ||
*Kipples Chestless can save minimal time if you pull it off optimally. | *Kipples Chestless can save minimal time if you pull it off optimally. | ||
*With good jumps and wind usage, you can skip the 3rd rat entering the pillars section. It is pretty precise and not recommended (Saves ~.25s). | *With good jumps and wind usage, you can skip the 3rd rat entering the pillars section. It is pretty precise and not recommended (Saves ~.25s). | ||
| + | *Rat Roll saves the same amount of time as Fat Roll. | ||
*The pillars can be done in various ways, all being the same speed. | *The pillars can be done in various ways, all being the same speed. | ||
| + | {{#ev:youtube|9pEcFeMQG6I|560||https://youtu.be/9pEcFeMQG6I}} | ||
| + | *Alternate way to take the rat pillars. saves -0.1s over jumping on rat 2,3 and 4. | ||
</div> | </div> | ||
</div> | </div> | ||
| − | |||
| − | |||
| − | |||
| − | |||
| − | |||
| − | |||
| − | |||
[[Category:Gloomy Gulch]] | [[Category:Gloomy Gulch]] | ||
[[Category:Level]] | [[Category:Level]] | ||
Revision as of 20:34, 3 March 2019
 | |
| Game | Donkey Kong Country 2 |
|---|---|
| World name | Gloomy Gulch |
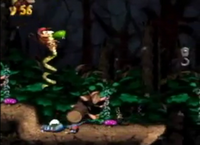
| Level name | Gusty Glade |
| Previous level | Haunted Hall |
| Next level | Parrot Chute Panic |
Difficulty:
- Safe: 4/10
- Optimal: 7/10
Any%
Safe
Notes
- The wind can be used to your advantage in this level. An example being the 3 first pits of the level; by letting yourself fall a little longer, you can get a bigger wind push onto the platform.
Optimal
Additions
- At 0:10, do not grab the chest before starting your roll (Saves ~.25s).
- At 0:16, roll over the pillars, instead of jumping on all of them. This is deceptively hard since the edges of the pillars can eat your rolls.
- At 0:31 is the Rolly Roll. After jumping to the ledge with the DK barrel, momentarily let go of Y and then press it again when you're close to the ledge (Saves ~.4s).
- On failure, use either the DK barrel (if you rolled too early) or the chest (too late) to quickly dispatch a Kutlass and keep moving.
- At 0:43, do not switch to Dixie for the final glide. Instead, team throw her into the barrel, allowing you to finish the stage with Diddy and to perform a Goal Swap (Saves over 1s).
MORE STRATS
- Kipples Chestless can save minimal time if you pull it off optimally.
- With good jumps and wind usage, you can skip the 3rd rat entering the pillars section. It is pretty precise and not recommended (Saves ~.25s).
- Rat Roll saves the same amount of time as Fat Roll.
- The pillars can be done in various ways, all being the same speed.
- Alternate way to take the rat pillars. saves -0.1s over jumping on rat 2,3 and 4.