Difference between revisions of "Gusty Glade"
Cryptonberry (talk | contribs) (→Any%) |
Cryptonberry (talk | contribs) m (→Any%) |
||
| Line 43: | Line 43: | ||
<div class="mw-collapsible-content"> | <div class="mw-collapsible-content"> | ||
{{#ev:youtube|t42yRmnEVow|560||https://www.youtube.com/watch?v=t42yRmnEVow}} | {{#ev:youtube|t42yRmnEVow|560||https://www.youtube.com/watch?v=t42yRmnEVow}} | ||
| − | *You only have to hold Right long enough to get over the bee. [http://imgur.com/YcOvnoE Letting go of Right before Diddy reaches | + | *You only have to hold Right long enough to get over the bee. [http://imgur.com/YcOvnoE Letting go of Right before Diddy reaches the branch is a good visual cue.] |
*Tap left around above the bush to correctly position yourself and not hit the target. Don't tap left for too long or you'll hit the bee. Timing may differ depending how long you initially held Right. | *Tap left around above the bush to correctly position yourself and not hit the target. Don't tap left for too long or you'll hit the bee. Timing may differ depending how long you initially held Right. | ||
*Instantly swap. | *Instantly swap. | ||
Revision as of 10:04, 11 December 2016
 | |
| Game | Donkey Kong Country 2 |
|---|---|
| World name | Gloomy Gulch |
| Level name | Gusty Glade |
| Previous level | Haunted Hall |
| Next level | Parrot Chute Panic |
Difficulty:
- Safe: 4/10
- Optimal: 6/10
Any%
Safe
Notes
- The wind can be used to your advantage in this level. An example being the 3 first pits of the level; by letting yourself fall a little longer, you can get a bigger wind push onto the platform.
Optimal
Additions
- At 0:07, do not grab the chest before starting your roll (Saves ~.25s).
- At 0:14, roll over the pillars, instead of jumping on all of them. This is deceptively hard since the edges of the pillars can eat your rolls.
- At 0:28 is the Rolly Roll. After jumping to the ledge with the DK barrel, momentarily let go of Y and then press it again when you're close to the ledge (Saves ~.4s).
- On failure, use either the DK barrel (if you rolled too early) or the chest (too late) to quickly dispatch a Kutlass and keep moving.
- Note that if you get stuck on the hook just before, you will come in too late on the Kutlass cycle and might fall on him.
- At 0:41, do not switch to Dixie for the final glide. Instead, team throw her into the barrel, allowing you to finish the stage with Diddy and to perform a Goal Swap (Saves over 1s).
- Note that the goal swap won't work without team throwing into the barrel.
MORE STRATS
- Kipples Chestless can save minimal time if you pull it off optimally.
- With good jumps and wind usage, you can skip the 3rd rat entering the pillars section. It is pretty precise and not recommended (Saves ~.25s).
- The pillars can be done in various ways, all being the same speed.
CRYPTON SWAP
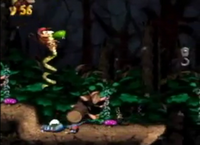
- You only have to hold Right long enough to get over the bee. Letting go of Right before Diddy reaches the branch is a good visual cue.
- Tap left around above the bush to correctly position yourself and not hit the target. Don't tap left for too long or you'll hit the bee. Timing may differ depending how long you initially held Right.
- Instantly swap.
- This saves about ~0.2 compared to a completely optimal normal method.