Difference between revisions of "Haunted Hall"
m |
m (keep this stuff to the discord we don't need 1 frame savers, speculation or random glitch notices) (Tag: Undo) |
||
| (45 intermediate revisions by 6 users not shown) | |||
| Line 7: | Line 7: | ||
| next = [[Gusty Glade]] | | next = [[Gusty Glade]] | ||
}} | }} | ||
| − | Difficulty: | + | Difficulty: Tupac Shakur/10 |
| − | |||
| − | |||
==Any%== | ==Any%== | ||
===Optimal=== | ===Optimal=== | ||
| − | {{#ev:youtube| | + | {{#ev:youtube|sgcW6lIqvBQ|560||https://www.youtube.com/watch?v=sgcW6lIqvBQ}} |
'''Notes''' | '''Notes''' | ||
*Jump up all upwards slopes, no matter the size. | *Jump up all upwards slopes, no matter the size. | ||
| − | *Jumping down small slopes will lose you time | + | *Jumping down small slopes will lose you time. Aim to jump down large slopes only. |
*Jumping on flat ground loses time, with some exceptions. | *Jumping on flat ground loses time, with some exceptions. | ||
*Jumping into the transition doors also saves minimal frames. Aim as high as you can. | *Jumping into the transition doors also saves minimal frames. Aim as high as you can. | ||
| − | **These may not feel like much, but an optimal Haunted Hall route can save up to | + | **These may not feel like much, but an optimal Haunted Hall route can save up to 5-6 seconds over a casual route. |
| − | *Jumping over the | + | *Jumping over the bees at 1:14 can be tricky. You have to get really close to their hitboxes (note that there is only one bee in the J version). |
| + | *You do not need to hold Right or Y in this stage. | ||
| − | ===Optimal Alternative | + | ===Optimal Alternative=== |
| − | {{#ev:youtube| | + | {{#ev:youtube|iIgdLnNv-ho|560||https://www.youtube.com/watch?v=iIgdLnNv-ho}} |
'''Notes''' | '''Notes''' | ||
| − | * | + | *Precisely follow where the video jumps and the size of these jumps. Failing to do so will cause you to not save nearly as much time as you could. |
| − | |||
**Nearly every jump has a visual cue at a railroad tie or wooden post (or shortly after one, in a few cases). | **Nearly every jump has a visual cue at a railroad tie or wooden post (or shortly after one, in a few cases). | ||
| − | *This route is difficult to learn/memorize, but saves ~ | + | **See the Optimal Alternative Map bellow for precise visual cues and jump heights. |
| − | ** | + | *This route is difficult to learn/memorize, but saves ~.6s over Djeez' route. |
| − | * | + | *'''Bizhawk practice scripts:''' [https://cdn.discordapp.com/attachments/115874413815005184/626917315186786342/hh_J.lua J] [https://cdn.discordapp.com/attachments/115874413815005184/626917298921406507/hh_U.lua U] (uses the most updated route). See the section below for more info. |
| + | |||
| + | <div class="toccolours mw-collapsible mw-collapsed" style="width:600px"> | ||
| + | '''Map of Optimal Alternative''' | ||
| + | <div class="mw-collapsible-content"> | ||
| + | *[https://imgur.com/a/s64Jow3 Imgur Album.] | ||
| + | *You should be jumping when the teeth of your cart touch the start of a line. Keep in mind that it takes a few frames for your cart to jump after pressing B. The lines in these images are precise to the pixel. | ||
| + | *Note that all consecutive jumps are buffered. | ||
| + | *White = A small jump is more optimal, but you should probably do a slightly larger jump for safety. | ||
| + | *Green = Smallest possible jump. | ||
| + | *Orange = Medium jump. It's on the larger side of medium, though (hard to explain). | ||
| + | *Red = Largest possible jump. | ||
| + | [[File:Before 1st Door.png]]<br> | ||
| + | [[File:Door1.png]]<br> | ||
| + | *Don't perform the crossed-out jump (I'm too lazy to remake the entire thing). | ||
| + | [[File:Door 2.png]]<br> | ||
| + | [[File:Door3.png]]<br> | ||
| + | *For the jump down the 1st large slope, prioritize doing the earliest possible jump rather than grabbing the 1st [+] barrel. Grabbing the 2nd [+] barrel only loses half a frame's worth of distance. | ||
| + | *Don't perform the crossed-out jump. | ||
| + | [[File:Door 4.png]]<br> | ||
| + | [[File:Door 5.png]]<br> | ||
| + | *Minor Corrections: The 3rd and 4th gap jumps should be initiated as late as possible. | ||
| + | [[File:J BEE SECTION.png]]<br> | ||
| + | *[https://www.youtube.com/watch?v=F0B0L9E7kXM Do this on U.] | ||
| + | [[File:WHIum3y.png]]<br> | ||
| + | *Don't perform the crossed-out jumps. | ||
| + | </div> | ||
| + | </div> | ||
[[Category:Gloomy Gulch]] | [[Category:Gloomy Gulch]] | ||
[[Category:Level]] | [[Category:Level]] | ||
Latest revision as of 19:01, 26 May 2023
 | |
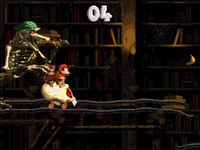
| Game | Donkey Kong Country 2 |
|---|---|
| World name | Gloomy Gulch |
| Level name | Haunted Hall |
| Previous level | Ghostly Grove |
| Next level | Gusty Glade |
Difficulty: Tupac Shakur/10
Any%
Optimal
Notes
- Jump up all upwards slopes, no matter the size.
- Jumping down small slopes will lose you time. Aim to jump down large slopes only.
- Jumping on flat ground loses time, with some exceptions.
- Jumping into the transition doors also saves minimal frames. Aim as high as you can.
- These may not feel like much, but an optimal Haunted Hall route can save up to 5-6 seconds over a casual route.
- Jumping over the bees at 1:14 can be tricky. You have to get really close to their hitboxes (note that there is only one bee in the J version).
- You do not need to hold Right or Y in this stage.
Optimal Alternative
Notes
- Precisely follow where the video jumps and the size of these jumps. Failing to do so will cause you to not save nearly as much time as you could.
- Nearly every jump has a visual cue at a railroad tie or wooden post (or shortly after one, in a few cases).
- See the Optimal Alternative Map bellow for precise visual cues and jump heights.
- This route is difficult to learn/memorize, but saves ~.6s over Djeez' route.
- Bizhawk practice scripts: J U (uses the most updated route). See the section below for more info.
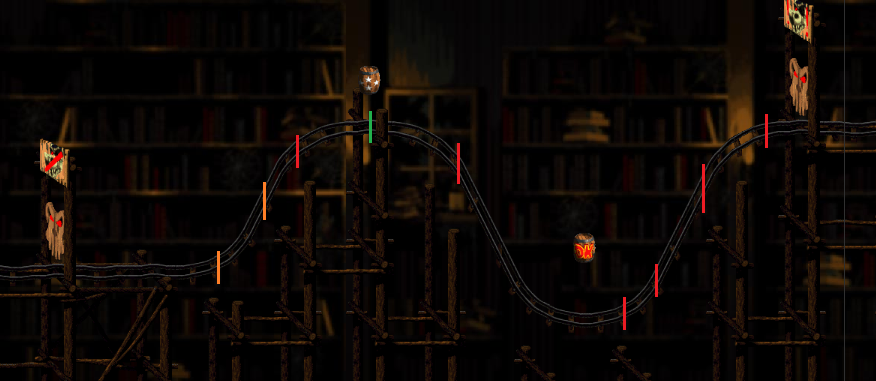
Map of Optimal Alternative
- Imgur Album.
- You should be jumping when the teeth of your cart touch the start of a line. Keep in mind that it takes a few frames for your cart to jump after pressing B. The lines in these images are precise to the pixel.
- Note that all consecutive jumps are buffered.
- White = A small jump is more optimal, but you should probably do a slightly larger jump for safety.
- Green = Smallest possible jump.
- Orange = Medium jump. It's on the larger side of medium, though (hard to explain).
- Red = Largest possible jump.
- Don't perform the crossed-out jump (I'm too lazy to remake the entire thing).
- For the jump down the 1st large slope, prioritize doing the earliest possible jump rather than grabbing the 1st [+] barrel. Grabbing the 2nd [+] barrel only loses half a frame's worth of distance.
- Don't perform the crossed-out jump.
- Minor Corrections: The 3rd and 4th gap jumps should be initiated as late as possible.
- Don't perform the crossed-out jumps.


