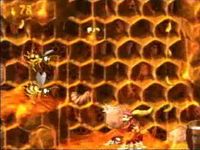
Difference between revisions of "Hornet Hole"
Cryptonberry (talk | contribs) |
Cryptonberry (talk | contribs) |
||
| Line 14: | Line 14: | ||
==Any%== | ==Any%== | ||
===Safe=== | ===Safe=== | ||
| − | {{#ev:youtube| | + | {{#ev:youtube|UUEIJaau8nQ|560||https://www.youtube.com/watch?v=UUEIJaau8nQ}} |
'''Notes''' | '''Notes''' | ||
*To activate the Scrolly Scroll: | *To activate the Scrolly Scroll: | ||
Revision as of 09:59, 12 April 2018
 | |
| Game | Donkey Kong Country 2 |
|---|---|
| World name | Krazy Kremland |
| Level name | Hornet Hole |
| Previous level | Kudgel's Kontest |
| Next level | Target Terror |
Difficulty:
- Safe: 6/10
- Optimal: 7/10
- Optimal Alternative: 9/10
Contents
Any%
Safe
Notes
- To activate the Scrolly Scroll:
- Platform with Squitter near the bottom of the hook.
- Press X to jump off of Squitter onto the hook.
- Press B to jump off the hook and land back onto Squitter.
- You have now stored the Scrolly Scroll glitch; roll into the Spiny and team-up before the honey.
- Holding right and Y, you must time your jump and team throws so that you don't hit the bees.
- Check out Twig's tutorial if you're still having trouble!
- To get the goal swap in this level, you need to land, run right ever so slightly, and then press select.
- Bad honey climbing will cost you a deceptive amount of time. Perfect the climbing technique!
TWIG'S TUTORIAL
- Twig's scrolly scroll setup is very viable for new players.
Optimal
Notes
- When opening Squitter's crate, wiggle so that you are holding left on first frame of landing on Squitter (Saves ~.1).
- At 0:32, kill the first bee instead of d-boosting through and then set up Scrolly Scroll with only 2 web platforms (Saves ~2s).
- Climb the final wall in 3 jumps instead of 4. Requires landing on the floor below the wall in a particular spot (Saves ~.25).
- Starting the climb from this spot will always give a good wall climb.
- If you jump out of your roll early at 0:56, delaying your glide will allow you to approach this spot at a lower height, making landing there easier (see "Optimal Alternative" video).
Optimal Alternative
Notes
- This route has you swapping to Diddy at the beginning instead of damage boosting later on in the level.
- Overall this route saves ~0.4, but is much more difficult.
- 0:13 Let go of Y and delay your repress until after the barrel. Rolling too soon will get you hit by the spiny.
- 0:17 This jump is a 2-3 frame window depending on where you start your roll. Jumping too early will result in hitting the bee upon executing your second jump.
MORE STRATS
- First method saves ~1s over the safe way.
- The two others are about the same speed and save ~1.5 to ~2s over the safe way.
- Damageless 2 is very slightly faster, so it is suggested to aim for that one. Failing it essentially just turns it into Damageless 1.