Difference between revisions of "Kannon's Klaim"
Cryptonberry (talk | contribs) m (→Optimal) |
Cryptonberry (talk | contribs) |
||
| Line 20: | Line 20: | ||
*Off-[[Tricks#Goal_Swapping | Goal swapping]] | *Off-[[Tricks#Goal_Swapping | Goal swapping]] | ||
| − | <div class="toccolours mw-collapsible mw-collapsed" style="width: | + | <div class="toccolours mw-collapsible mw-collapsed" style="width:600px"> |
'''TEAM THROW SUPER JUMP TUTORIAL''' | '''TEAM THROW SUPER JUMP TUTORIAL''' | ||
<div class="mw-collapsible-content"> | <div class="mw-collapsible-content"> | ||
| − | [[File:kk1.jpg]] | + | [[File:kk1.jpg|588px]] |
*While on the ground, team-up with Dixie. | *While on the ground, team-up with Dixie. | ||
*Jump up so that Diddy is right next to the hook. | *Jump up so that Diddy is right next to the hook. | ||
| − | [[File:kk2.jpg]] | + | [[File:kk2.jpg|588px]] |
*At the peak of Diddy's jump, throw Dixie. | *At the peak of Diddy's jump, throw Dixie. | ||
| Line 34: | Line 34: | ||
*If Diddy doesn't land on the hook, then you were too far right and the recoil was not able to place Diddy onto the hook. | *If Diddy doesn't land on the hook, then you were too far right and the recoil was not able to place Diddy onto the hook. | ||
| − | [[File:kk3.jpg]] | + | [[File:kk3.jpg|588px]] |
*Right when Dixie hits the [http://www.mariowiki.com/Kannon Kannon] and begins traveling back to Diddy, jump. | *Right when Dixie hits the [http://www.mariowiki.com/Kannon Kannon] and begins traveling back to Diddy, jump. | ||
| − | [[File:kk4.jpg]] | + | [[File:kk4.jpg|588px]] |
*You want to immediately press and hold jump again before Dixie gets back to Diddy. | *You want to immediately press and hold jump again before Dixie gets back to Diddy. | ||
*The timing on these jumps is tight; if you were too slow in jumping, then Diddy will just fall. If you were too fast in jumping, you will not maximize your height, and not spawn the barrel. | *The timing on these jumps is tight; if you were too slow in jumping, then Diddy will just fall. If you were too fast in jumping, you will not maximize your height, and not spawn the barrel. | ||
| − | [[File:kk5.jpg]] | + | [[File:kk5.jpg|588px]] |
*If you made it this high, then your jump is good on height. All that's required now is to make the warp barrel in one throw. | *If you made it this high, then your jump is good on height. All that's required now is to make the warp barrel in one throw. | ||
| Line 50: | Line 50: | ||
*The way the camera pans affects the loading of the warp barrel, but not too much is known about that. | *The way the camera pans affects the loading of the warp barrel, but not too much is known about that. | ||
| − | [[File:kk6.jpg]] | + | [[File:kk6.jpg|588px]] |
*Done! | *Done! | ||
| Line 61: | Line 61: | ||
</div> | </div> | ||
</div> | </div> | ||
| − | |||
[[Category:Crocodile Cauldron]] | [[Category:Crocodile Cauldron]] | ||
[[Category:Level]] | [[Category:Level]] | ||
Revision as of 11:51, 6 January 2019
 | |
| Game | Donkey Kong Country 2 |
|---|---|
| World name | Crocodile Cauldron |
| Level name | Kannon's Klaim |
| Previous level | Hot-Head Hop |
| Next level | Lava Lagoon |
Difficulty:
- Safe: 1/10
- Optimal: 5/10
Any%
Safe
Optimal
Notes
- Team Throw Super Jump (This one saves 2.5s to 3s).
- Off- Goal swapping
TEAM THROW SUPER JUMP TUTORIAL
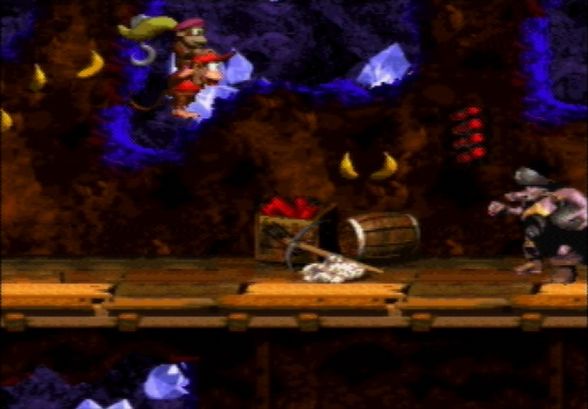
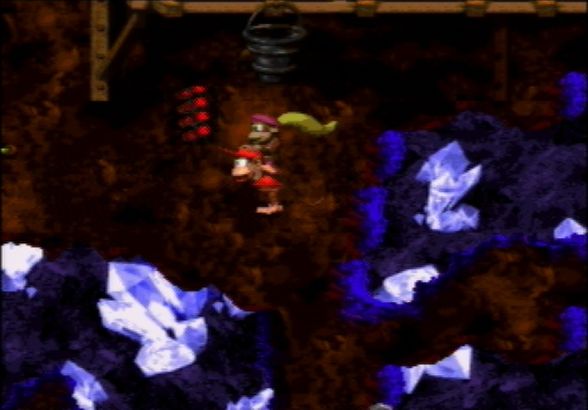
- While on the ground, team-up with Dixie.
- Jump up so that Diddy is right next to the hook.
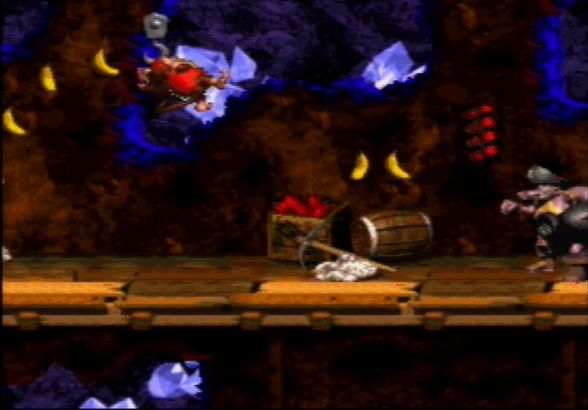
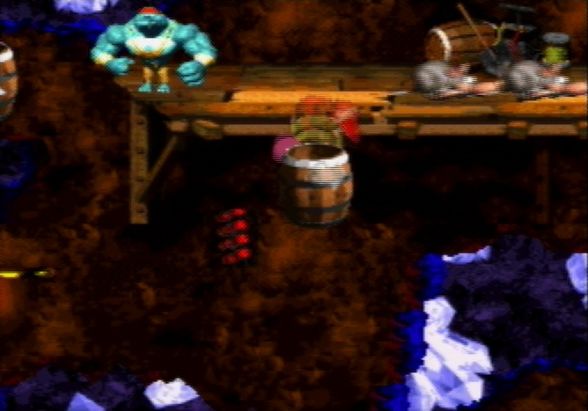
- At the peak of Diddy's jump, throw Dixie.
- The recoil from the throw will place Diddy on the hook.
- If Diddy doesn't land on the hook, then you were too far right and the recoil was not able to place Diddy onto the hook.
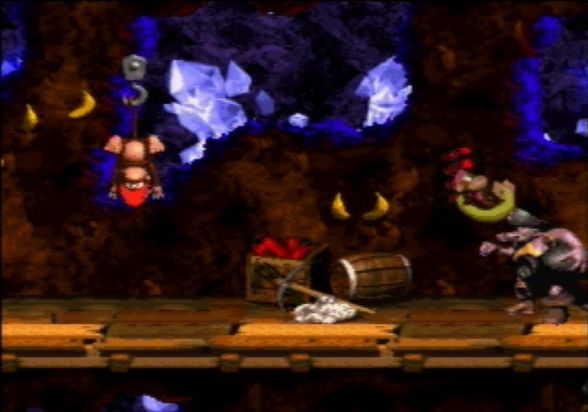
- Right when Dixie hits the Kannon and begins traveling back to Diddy, jump.
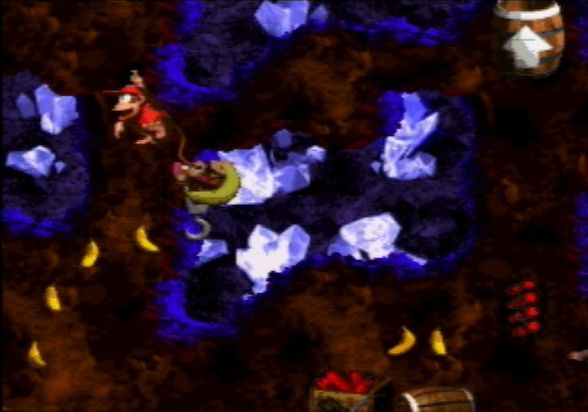
- You want to immediately press and hold jump again before Dixie gets back to Diddy.
- The timing on these jumps is tight; if you were too slow in jumping, then Diddy will just fall. If you were too fast in jumping, you will not maximize your height, and not spawn the barrel.
- If you made it this high, then your jump is good on height. All that's required now is to make the warp barrel in one throw.
- If your height is not enough, you can try throwing a second time after Dixie comes back from hitting enemies on the platform above.
- If your height is really not enough, even the second throw will hit nothing.
- If your height is not enough, you can try throwing a second time after Dixie comes back from hitting enemies on the platform above.
- The way the camera pans affects the loading of the warp barrel, but not too much is known about that.
- Done!
- As a recap, the inputs are:
- A (team-up)
- B (jump to the right of the hook)
- Y (throw Dixie at the Kannon)
- B (jump off the hook as Dixie hits the Kannon and begins tracking back)
- B (jump when Dixie is coming back to you. This input is much faster than you would expect it to be, and you typically want to press and hold B to maximize height)
