Difference between revisions of "Kannon's Klaim"
m |
(removing dbj-unapproved edits) |
||
| Line 11: | Line 11: | ||
*Optimal: 5/10 | *Optimal: 5/10 | ||
==Any%== | ==Any%== | ||
| − | + | '''Safe:''' {{#ev:youtube|jyklUob4d80|560||http://www.youtube.com/watch?v=jyklUob4d80}} | |
| − | + | '''Optimal:''' {{#ev:youtube|ssm_6yERjrM|560||http://www.youtube.com/watch?v=ssm_6yERjrM}} | |
| − | + | ==102%== | |
| − | + | {{#ev:youtube|_2YzEO3dEXg|560||http://www.youtube.com/watch?v=_2YzEO3dEXg}} | |
| − | |||
| − | |||
| − | |||
| − | + | ==Team Up Double Jump Tutorial== | |
| − | |||
| − | |||
| − | |||
[[File:kk1.jpg]] | [[File:kk1.jpg]] | ||
| − | *While on the ground, team-up with Dixie | + | *While on the ground, team-up with Dixie |
| − | *Jump up so that Diddy | + | *Jump up so that Diddy right next to the hook |
[[File:kk2.jpg]] | [[File:kk2.jpg]] | ||
| − | *At the peak of Diddy's jump, throw Dixie | + | *At the peak of Diddy's jump, throw Dixie |
| − | *The recoil from the throw will place Diddy on the hook | + | *The recoil from the throw will place Diddy on the hook |
| − | *If Diddy doesn't land on the hook, then | + | *If Diddy doesn't land on the hook, then your positioning was bad and the recoil was not able to place Diddy onto the hook |
[[File:kk3.jpg]] | [[File:kk3.jpg]] | ||
| − | *Right when Dixie hits the | + | *Right when Dixie is hits the Kannon and begins traveling back to Diddy, jump with Diddy |
[[File:kk4.jpg]] | [[File:kk4.jpg]] | ||
| − | *You want to immediately press and hold jump again before Dixie gets back to Diddy | + | *Dixie will always track back to Diddy's location |
| − | *The timing on | + | *You want to immediately press and hold jump again before Dixie gets back to Diddy |
| + | *The timing on this jump is the tightest; if you were too slow in jumping, then Diddy will just fall. If you were too fast in jumping, you will not maximize your height. This will most likely result in needing two throws to reach the warp barrel, or not even reaching the barrel at all | ||
[[File:kk5.jpg]] | [[File:kk5.jpg]] | ||
| − | *If you made it this high, then your jump is good on height. All that's required | + | *If you made it this high, then your jump is good on height. All that's required to make the warp barrel is one throw. |
| − | * | + | *Sometimes, your jump might be too low, but you can still make the warp barrel with two throws |
| − | + | *The way the camera pans affects the loading of the warp barrel, although not too much is known about that. | |
| − | *The way the camera pans affects the loading of the warp barrel, | ||
[[File:kk6.jpg]] | [[File:kk6.jpg]] | ||
| Line 58: | Line 52: | ||
**Y (throw Dixie at the Kannon) | **Y (throw Dixie at the Kannon) | ||
**B (jump off the hook as Dixie hits the Kannon and begins tracking back) | **B (jump off the hook as Dixie hits the Kannon and begins tracking back) | ||
| − | **B (jump when Dixie is coming back to you. This input is much faster than you would expect it to be | + | **B (jump when Dixie is coming back to you. This input is much faster than you would expect it to be and you typically want to press and hold B to maximize height) |
| − | |||
| − | |||
| − | |||
| − | |||
| − | |||
| − | |||
| − | |||
| − | |||
[[Category:Crocodile Cauldron]] | [[Category:Crocodile Cauldron]] | ||
[[Category:Level]] | [[Category:Level]] | ||
Revision as of 04:08, 7 June 2014
 | |
| Game | Donkey Kong Country 2 |
|---|---|
| World name | Crocodile Cauldron |
| Level name | Kannon's Klaim |
| Previous level | Hot-Head Hop |
| Next level | Lava Lagoon |
Difficulty:
- Safe: 0/10
- Optimal: 5/10
Any%
Safe:
Optimal:
102%
Team Up Double Jump Tutorial
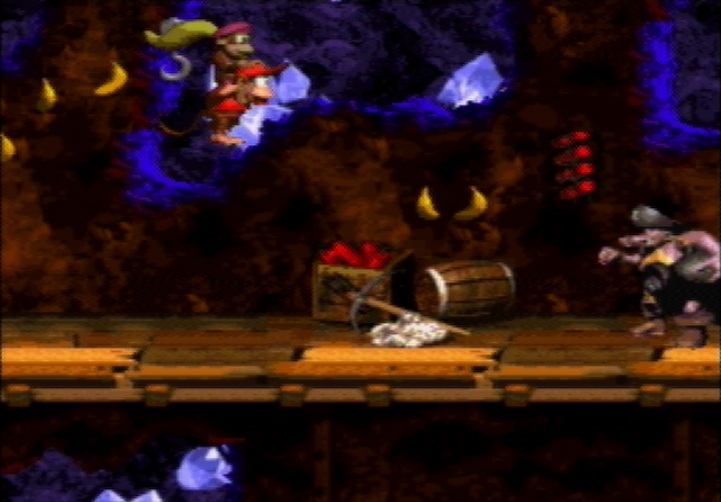
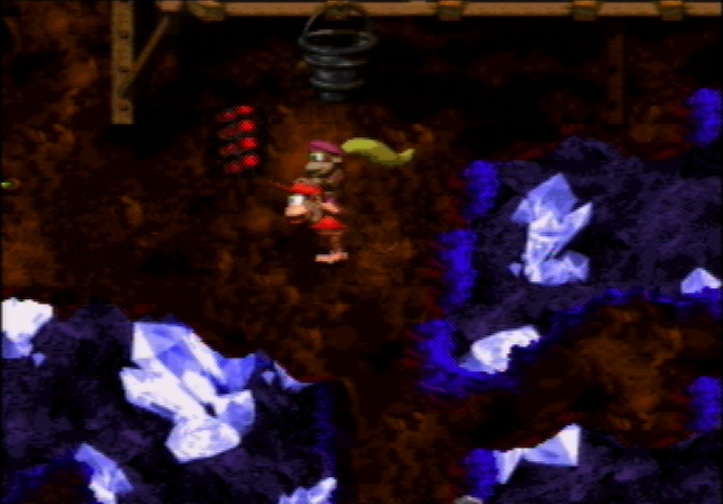
- While on the ground, team-up with Dixie
- Jump up so that Diddy right next to the hook
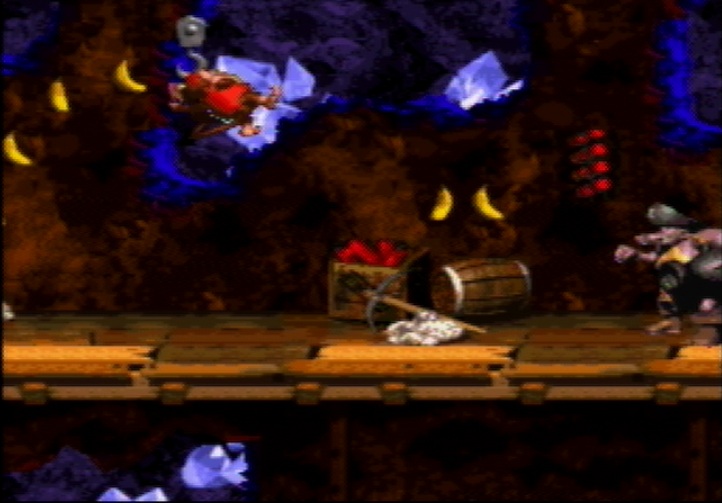
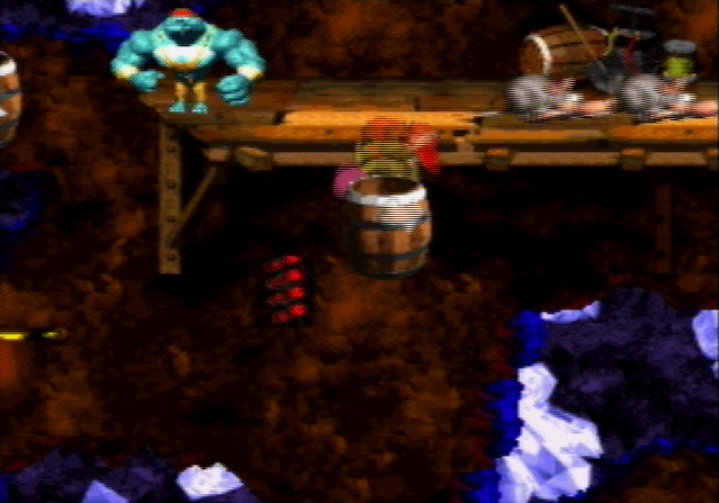
- At the peak of Diddy's jump, throw Dixie
- The recoil from the throw will place Diddy on the hook
- If Diddy doesn't land on the hook, then your positioning was bad and the recoil was not able to place Diddy onto the hook
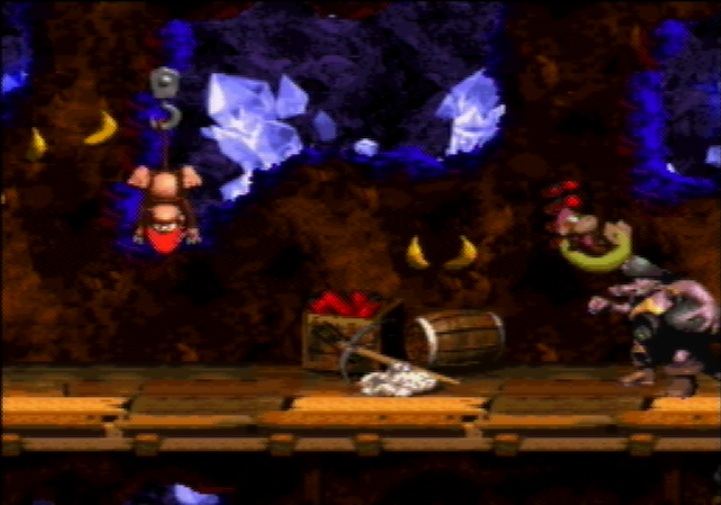
- Right when Dixie is hits the Kannon and begins traveling back to Diddy, jump with Diddy
- Dixie will always track back to Diddy's location
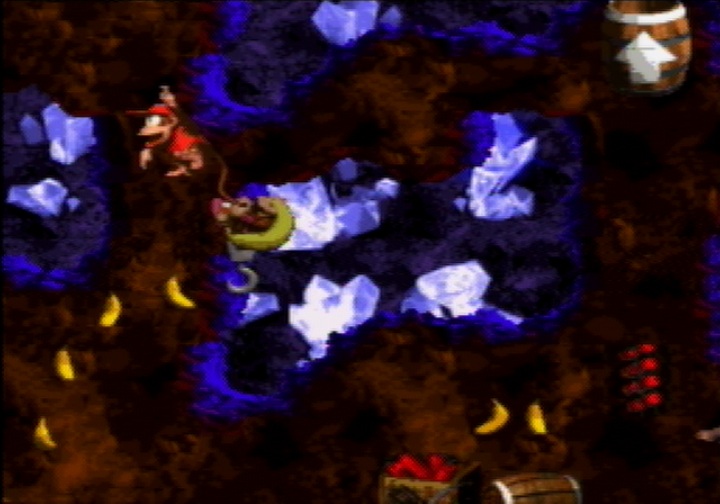
- You want to immediately press and hold jump again before Dixie gets back to Diddy
- The timing on this jump is the tightest; if you were too slow in jumping, then Diddy will just fall. If you were too fast in jumping, you will not maximize your height. This will most likely result in needing two throws to reach the warp barrel, or not even reaching the barrel at all
- If you made it this high, then your jump is good on height. All that's required to make the warp barrel is one throw.
- Sometimes, your jump might be too low, but you can still make the warp barrel with two throws
- The way the camera pans affects the loading of the warp barrel, although not too much is known about that.
- Done!
- As a recap, the inputs are:
- A (team-up)
- B (jump to the right of the hook)
- Y (throw Dixie at the Kannon)
- B (jump off the hook as Dixie hits the Kannon and begins tracking back)
- B (jump when Dixie is coming back to you. This input is much faster than you would expect it to be and you typically want to press and hold B to maximize height)
