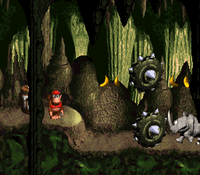
Manic Mincers
 | |
| Game | Donkey Kong Country |
|---|---|
| World name | Chimp Caverns |
| Level name | Manic Mincers |
| Previous level | Tanked Up Trouble |
| Next level | Misty Mine |
Difficulty:
- Optimal (Damageless SJR): 7/10
- Optimal (No SJR): 7/10
- Safe: 2/10
- Revisit: 2/10
Contents
All Stages - First Visit
Optimal (Damageless SJR)
Notes:
- As long as you roll onto the animal box, you will not break it until you step off of it.
- From the point where you take damage, you need to continue holding B as you roll onto the crate (and up until you're flying through the air doing the SJR).
- Get in the habit of wiggling back towards the box as soon as you press Y when trying to hit the frame. If you are early, you can keep trying to hit the frame (see video below).
SJR with Multiple Attempts
Notes:
- You can do a preemptive wiggle back towards the box, so that if you're early on the frame and get a roll, you can keep trying.
- This can be done on either the right or left side of the box, whichever you prefer.
Optimal (No SJR)
Notes:
- Rambi is a giant rhinoceros, so they presumably put a delay on his jump to make him feel heavy. Be aware of that while practicing, as it makes the first half of this level much more difficult. If you get close to an enemy, Rambi will auto lunge too, so be careful of this, as it can greatly mess up any section involving using him.
- When mounting Rambi, you can do a wiggle left and then gain momentum rightward prior to landing on him to start with a higher speed Animal Buddy Fast Start. Note that this makes getting past the mincer much tighter though.
- Rambi can be partially off a ledge before needing to jump, so take advantage of that for certain jumps (such as the one immediately after mounting Rambi).
- Pay attention to where wiggling (fast left-rights) or dpad releases are used to safely pass through the spinning mincers.
- For the jumps over the mincers starting at 0:14, hold B after hitting the first Gnawty until you get over the double mincers.
- At 0:25, you have to do a precise jump through three moving mincers. Pause the video to find a visual cue; you can use either the dip in the ground or one of the stalagmites in the first background layer.
- You can use the bananas after the spinning mincers as a cue to land on the first moving platform. For the second one, make sure you jump on the edge of the platform so that the damage boost will carry you to other side. Too early and you will plummet.
Safe (Super Jump)
Notes:
All Stages - Revisit for Platform Perils Skip
Optimal
Notes:
- Optimally, you would revisit Manic Mincers immediately after playing through Misty Mine.
- Here we are setting up the Split-up Glitch, which prepares us to do a skip in Platform Perils.
- The risky barrel throw here saves ~0.3 seconds over jumping with the barrel. It's risk because if the barrel breaks, you will have to swap to DK, kill him off, then re-enter the stage and try again to set up the Split-up Glitch.
Safe
Notes:
- To be safe, you can revisit this stage after completing Loopy Lights instead of Misty Mine, to avoid softlocking in Loopy.
- Here we are setting up the Split-up Glitch, which prepares us to do a skip in Platform Perils.
- This version uses a safer barrel throw.