Difference between revisions of "Misty Mine 101"
| Line 1: | Line 1: | ||
Difficulty: 10/10 | Difficulty: 10/10 | ||
| − | ===SJR=== | + | ===3 SJR=== |
{{#ev:youtube|K8OHCjUaB3I|560||https://www.youtube.com/watch?v=K8OHCjUaB3I}} | {{#ev:youtube|K8OHCjUaB3I|560||https://www.youtube.com/watch?v=K8OHCjUaB3I}} | ||
Notes: | Notes: | ||
| − | |||
*This video has commentary explaining a couple things. Input display should also help. | *This video has commentary explaining a couple things. Input display should also help. | ||
| + | ===4 SJR=== | ||
{{#ev:youtube|iNVRA5ufi5g|560||}} | {{#ev:youtube|iNVRA5ufi5g|560||}} | ||
| − | |||
*The video shows you where specifically to release B. | *The video shows you where specifically to release B. | ||
| + | *Saves 2 seconds over an optimal SFR. | ||
| + | *Also just do the SFR | ||
===SFR=== | ===SFR=== | ||
{{#ev:youtube|swWz8mpmVGM|560||}} | {{#ev:youtube|swWz8mpmVGM|560||}} | ||
Notes: | Notes: | ||
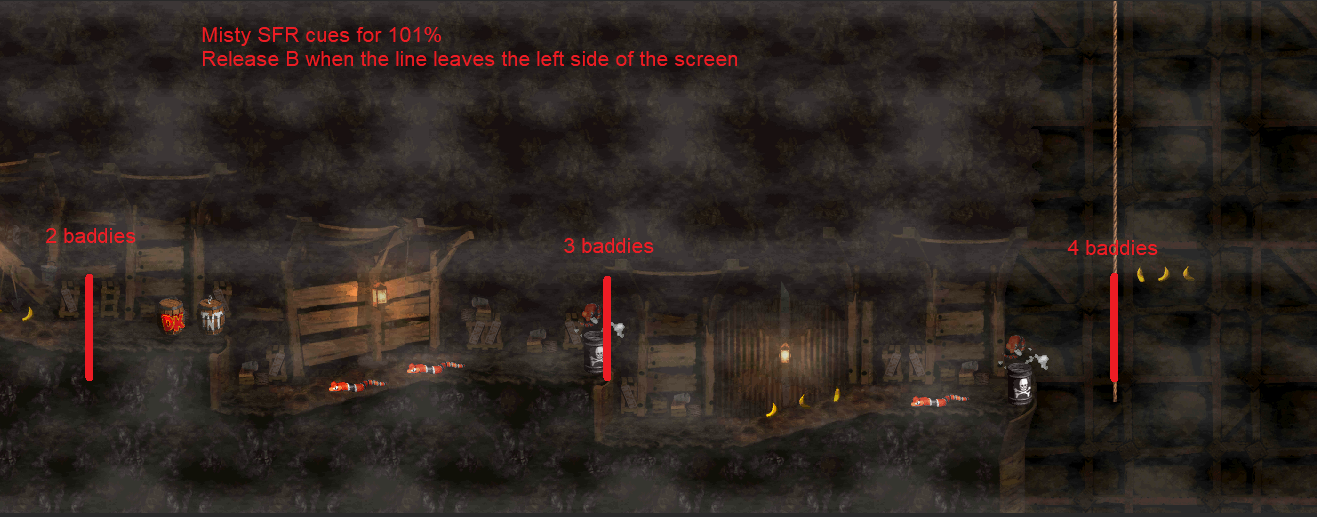
| − | *It is recommended to learn the SFR for this stage, as optimally it saves around 8 seconds over the normal route. Refer to the below video if you're not doing the SFR | + | *It is recommended to learn the SFR for this stage, as optimally it saves around 8 seconds over the normal route. Refer to the below video if you're not doing the SFR or SJR |
<div class="toccolours mw-collapsible mw-collapsed" style="width:600px"> | <div class="toccolours mw-collapsible mw-collapsed" style="width:600px"> | ||
Revision as of 22:08, 3 February 2020
Difficulty: 10/10
Contents
3 SJR
Notes:
- This video has commentary explaining a couple things. Input display should also help.
4 SJR
- The video shows you where specifically to release B.
- Saves 2 seconds over an optimal SFR.
- Also just do the SFR
SFR
Notes:
- It is recommended to learn the SFR for this stage, as optimally it saves around 8 seconds over the normal route. Refer to the below video if you're not doing the SFR or SJR
No SFR/SJR
Notes:
- Keeping the TNT barrel can be tricky and is the only way to open the bonus. Practice jumping over the klaptraps so it doesn't seem terrifying.
- You don't gain control of your Kongs in the last bonus until about half way through the bonus, so you have to let go of the dpad, jump and then hold right.
If you try to hold right and jump you'll only jump through the last barrel.
- The jump at 1:15 is really precise. Too early you will fall in the pit and die. Too late and you will hit the army and die
