Difference between revisions of "Parrot Chute Panic"
Cryptonberry (talk | contribs) m |
Cryptonberry (talk | contribs) m (→Optimal) |
||
| Line 70: | Line 70: | ||
*Minimize time spent gliding as Dixie. | *Minimize time spent gliding as Dixie. | ||
| − | |||
<div class="toccolours mw-collapsible mw-collapsed" style="width:600px"> | <div class="toccolours mw-collapsible mw-collapsed" style="width:600px"> | ||
'''Map of Optimal Route''' | '''Map of Optimal Route''' | ||
Revision as of 05:37, 6 January 2019
 | |
| Game | Donkey Kong Country 2 |
|---|---|
| World name | Gloomy Gulch |
| Level name | Parrot Chute Panic |
| Previous level | Gusty Glade |
| Next level | Web Woods |
Difficulty:
- Baby: 4/10
- Baby/Safe Mix: 4.5/10
- Safe: 5/10
- Optimal: 8/10
Any%
Baby
Starter Notes
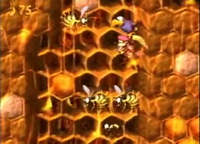
- There can be a couple of frustrating things when learning this level; the most frustrating being the Diddy headbutt (seen at 0:51).
- Occasionally during this hit, Diddy will not launch himself into the crack inbetween the bee, causing you to lose invincibility frames and the ability to keep falling down without dying to the bees (See Backups section if you missed the headbutt).
Between "Baby" and "Safe"
Notes
- This is for those who don't need the use of Mid Point Parrot (as shown on Baby strats), but also aren't confident in doing the Jump Buffer strats. Is a tad bit slower, but for beginners should be the recommend strats to start.
- Also shows a flutter pre-headbutt which can help into making the headbutt 100% consistant, also helps to make sure you won't get hit by the bees by moving too early/late
Safe
- Buffer the jump at 0:38
1 Frame Barrel Set-Up
Trick Notes:
- This trick saves 0.55s.
- If you roll into the beetle one frame after the DK barrel breaks you'll skip the freeze animation when you get a Kong.
- This is due to the fact that you have one frame of movement after the DK barrel breaks, and if you begin rolling through an enemy during this frame, then you can cancel the freeze.
Set-Up Notes:
- This set-up only works if you're using Dixie.
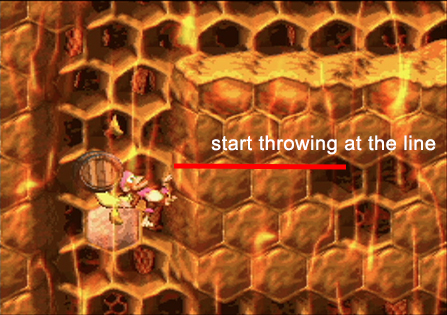
- You want to grab the barrel and hug the wall on the right as you're falling.
- Start throwing in the middle of the wall or you can use the second banana as a visual (see image above).
- As soon as you land immediately roll into the beetles.
- This set-up has potential to fail if you throw too high or too low, and the throw does not need to be perfect but close to it.
Optimal
Additions
- 0:04 Performing a small jump here saves 3 frames if done optimally. Most of the time, though, it will probably break even with the normal strat.
- A good way to avoid the midpoint parrot is to mash the Y button, then hold it before you start rolling. Mashing will buffer the roll.
- At 0:32, do not damage through the bee. Instead, go down an extra level, roll off the platform then quickly tap right so that Dixie is stuck against the wall and finally jump into a headbutt. This allows more continuous dropping (Saves ~3s, or 2.5s if you get the 1 Frame Barrel (see above)).
- If you get hit after the roll off part, you can often navigate down to the DK barrel with invincibility frames.
- At 0:45, drop right instead of left, allowing you to fall in one smooth motion (Saves ~.25s).
- Minimize time spent gliding as Dixie.
Map of Optimal Route
Backups
Notes
- Riz 1d can be used as a backup if you roll for too long and hit the left wall, or simply as an alternative strategy.


