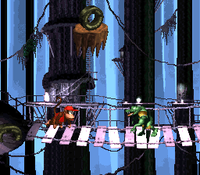
Rope Bridge Rumble
Revision as of 20:52, 10 November 2019 by Cryptonberry (talk | contribs)
 | |
| Game | Donkey Kong Country |
|---|---|
| World name | Gorilla Glacier |
| Level name | Rope Bridge Rumble |
| Previous level | Torchlight Trouble |
| Next level | Really Gnawty Rampage |
Difficulty:
- Safe: 6/10
- Optimal: 8.5/10
- 101%: 9/10
All Stages
Safe
Notes:
- This route avoids all tire rolls, the extendo, and the backwards bounce off the Army at the end. Some of the rolls are in different places as a result.
Optimal
Notes:
- To do the extendo at :23, release Y after the second guy and repress on the tire. If you realize you've mistimed it, you just have to jump right after rolling over the tire
- The turn around right after the extended roll is done to manipulate the time that the platforms spawn on the screen. Failing to do so will make the jumps impossible without waiting for them to turn back around. After practice, you can do it very fast like shown in the video, but you can wait longer to start off.
- You also need to quickly release and repress right on the D-pad before the second tire roll in order to make the jump.
- To do the secton at :33, you will want to roll off the first tire right after it starts moving towards the right, which can be tricky to time. Then you'll need to jump and land low enough on the next tire platform so that you only land on the platform. While standing somewhere near the center, you will want to roll off the 2nd platform right before you reach the banana at the top of the screen
- To make it under the bees at the end, you need to turn around before hitting the army as late as possible. If you get a good backboost, roll immediately. Slightly weaker and you need to step forward a bit. If you lose a lot of speed, don't try to go under the bees at all.
SJR setup
Notes:
- This won't work at all if you don't enter with Diddy already in front.
- Saves ~8s but has a very costly setup time, so I'd only bother going for this if you're trying to take WR or have had a bad w4/missed frenzy sjr.
- If you fail the setup it is recommended to grab the next DK barrel you come across.
- If you lose diddy in torchlight it is still faster to re-enter and grab a kong to go for the sjr.
101%
Optimal
Notes:
- To do the extendo at :26, release Y after the second guy and repress on the tire. If you fail it, you just have to jump at the end. Mashing Y at the start helps if you miss the hit on the second guy often.
- The turn around right after the extended roll is done to manipulate the time that the platforms spawn on the screen. Failing to do so will make the jumps impossible without waiting for them to turn back around. After practice, you can do it very fast like shown in the video, but starting off, face left longer to be sure it worked.
- The tire roll at :37 is tough, as the platform is moving. The other strat is to wait on the tire then bonuce up, which only loses .6 on average.
- When exiting the last bonus do not roll right away or you will get hit, inch yourself forward a bit so that when you roll, you make it under the bee unharmed.