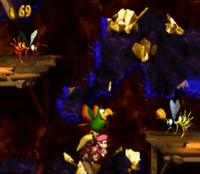
Squawk's Shaft 102
 | |
| Game | Donkey Kong Country 2 |
|---|---|
| World name | Crocodile Cauldron |
| Level name | Squawk's Shaft |
| Previous level | Red-Hot Ride |
| Next level | Kleever's Kiln |
Difficulty:
- Safe: 4/10
- Optimal: 5/10
Safe
Notes
- At 0:25, bounce on the krook and throw straight up, without moving left any further.
- It's actually possible to jump on the krook from the left, but it's considerably harder.
- At 0:51, don't hesitate and roll through the krook before he throws his hook.
- In the second bonus, holding Y and right shooting out of the last barrel saves 0.1s.
- You may opt to wait out the hooks in the vertical flying section, as shooting them can be tricky.
- At 1:45, make sure to shoot the krook on the top platform, or he will be in the way.
Optimal
Additions
- The BigBoi to enter the first bonus is not particularly hard and saves 2.8s.
- Throwing Dixie when in front of the lightbulb is a good visual cue. Throwing from too far left will overshoot the klomp and miss.
- In the first bonus, you can attempt to press A at the same time the Kremkoin is collected to lock the camera, saving ~0.25s.
- The jump on the klomp after exiting the first bonus can be tricky and only saves ~0.16s.
- At 1:00, a Team Up Jump can be used to enter the barrel without throwing Dixie into it, saving 0.5s. Be careful though, as an early jump input could cause walking off the edge.
- The roll to open the Squawks box in one jump saves ~0.5s.
- Timing the eggshots in the third bonus, as opposed to mashing, maximizes the horizontal movement thanks to the extra time spent holding Y.