Difference between revisions of "Web Woods"
m (1 revision imported) |
m |
||
| Line 12: | Line 12: | ||
*Optimal: 12/10 | *Optimal: 12/10 | ||
==Any%== | ==Any%== | ||
| − | ===Baby==={{#ev:youtube|KNL_K86pCjA|560||http://www.youtube.com/watch?v=KNL_K86pCjA}} | + | ===Baby=== |
| + | {{#ev:youtube|KNL_K86pCjA|560||http://www.youtube.com/watch?v=KNL_K86pCjA}} | ||
'''Notes''' | '''Notes''' | ||
*Do not be fooled, the baby route is still hard. It does however use a lot of extra platforms, and avoids all the damage boosts. | *Do not be fooled, the baby route is still hard. It does however use a lot of extra platforms, and avoids all the damage boosts. | ||
| Line 19: | Line 20: | ||
| − | ===Safe==={{#ev:youtube|fX4tZC5EWVU|560||https://www.youtube.com/watch?v=fX4tZC5EWVU}} | + | ===Safe=== |
| + | {{#ev:youtube|fX4tZC5EWVU|560||https://www.youtube.com/watch?v=fX4tZC5EWVU}} | ||
'''Notes''' | '''Notes''' | ||
*Before the Squitter section, use the bottom path and roll through the rats. The purple flower before the TNT Klobber is a good cue for where to roughly jump from. | *Before the Squitter section, use the bottom path and roll through the rats. The purple flower before the TNT Klobber is a good cue for where to roughly jump from. | ||
| Line 27: | Line 29: | ||
| − | ===Optimal==={{#ev:youtube|zczKVDAGMFc|560||https://www.youtube.com/watch?v=zczKVDAGMFc}} | + | ===Optimal=== |
| + | {{#ev:youtube|zczKVDAGMFc|560||https://www.youtube.com/watch?v=zczKVDAGMFc}} | ||
'''Additions''' | '''Additions''' | ||
*At 0:09, take the corners as tight as you can so that you get optimal speed rolling through the rats. | *At 0:09, take the corners as tight as you can so that you get optimal speed rolling through the rats. | ||
Revision as of 07:05, 4 July 2015
 | |
| Game | Donkey Kong Country 2 |
|---|---|
| World name | Gloomy Gulch |
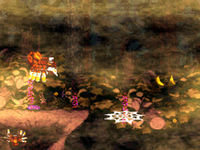
| Level name | Web Woods |
| Previous level | Parrot Chute Panic |
| Next level | Kreepy Krow |
Difficulty:
- Baby: 6/10
- Safe: 8/10
- Optimal: 12/10
Contents
Any%
Baby
Notes
- Do not be fooled, the baby route is still hard. It does however use a lot of extra platforms, and avoids all the damage boosts.
- Instant Platforms will need to be practiced before you can be consistent at this stage, no matter the route.
- Getting the proper feel for good platforms takes a while. The main mistake is usually making it too late, which is typically an instant death.
Safe
Notes
- Before the Squitter section, use the bottom path and roll through the rats. The purple flower before the TNT Klobber is a good cue for where to roughly jump from.
- The two Squitter damage boosts will require practice before you can tackle this route.
- A good visual cue for this would be the damage star sprite: jump as soon as it disappears (note that cues of the sort are different from what platform you play the game on, and other input lag variables).
- At 1:13, the banana coin on the screen is a good point of reference to know how close your web is to the platform.
Optimal
Additions
- At 0:09, take the corners as tight as you can so that you get optimal speed rolling through the rats.
- Always repress Y before the rats on the lowest section. If you get the optimal roll nothing will be affected, but if you get the slow one, you will avoid dying by restarting a new roll.
- At 0:40, reach the platform in 2 webs after the damage boost. If you've taken the damage boost near the eye of the top bee or further, it is not too difficult (Saves ~.3s).
- At 0:57 is Eagle Jump: only use 3 webs to cross the chasm. There is no real trick to be successful here, other than practicing the inputs. You need to be confident in your ability to know where the last web will auto-create to be optimal.
- You can also manually create the last web. It is safer, but an extra input is needed.
- At 1:09 is Leap of Faith: jump before your platform is created. Once again, you can time an auto-platform or manually input the web formation.
MORE STRATS
- First strat is easy if you buffer the first roll very hard. Repress Y after the DK barrel (Saves ~.3s).
- Failing to get full speed for the 2nd roll will still make you just as quick as the safe route.
- TAS Up-In-2 is a different method of doing the first damage boost section, if you struggle with the other one. It is roughly the same speed if you don't stop to take your shots.