Difference between revisions of "Lightning Lookout 103"
(→Optimal) |
|||
| (4 intermediate revisions by 2 users not shown) | |||
| Line 1: | Line 1: | ||
| + | {{Infobox level | ||
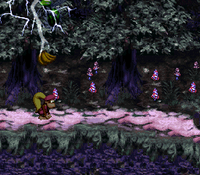
| + | | image = Lightning Lookout.png | ||
| + | | game = Donkey Kong Country 3 | ||
| + | | world_name = [[KAOS Kore]] | ||
| + | | level_name = Lightning Lookout | ||
| + | | previous = [[Sewer Stockpile]] | ||
| + | | next = [[Koindozer Klamber 103]] | ||
| + | }} | ||
===Optimal=== | ===Optimal=== | ||
| − | {{#ev:youtube| | + | {{#ev:youtube|Y42Ry8Vn8dw|560||https://www.youtube.com/watch?v=Y42Ry8Vn8dw}} |
'''Notes''' | '''Notes''' | ||
| − | *Much of the lightning manipulation is the same as [[Lightning Lookout|any%]]. A few spots are different due to damage boosting in different places and entering/exiting bonuses. | + | *Much of the lightning manipulation is the same as [[Lightning Lookout#Optimal|any%]]. A few spots are different due to damage boosting in different places and entering/exiting bonuses. |
| + | *At 0:20, if you move too quickly to the right after the red Buzzers have moved out of the way, the next lightning can strike above the pool of water. This can cause you to get hit as you swim towards the first bonus. | ||
| + | *The hitboxes on the beetles in the first bonus can be nasty. Jump out of the water quite far left of them to avoid getting hit. | ||
*For the d-boost to get the keg starting at 0:46, hit the bird near its centre, then hold B+Y+Right to reach the 2nd bird. | *For the d-boost to get the keg starting at 0:46, hit the bird near its centre, then hold B+Y+Right to reach the 2nd bird. | ||
| − | ** | + | *Follow the movement after getting the keg very closely to manip the lightning to strike on top of the DK barrel after halfway |
| + | *The lightning in the 2nd bonus uses the same tracking mechanism as the rest of the level. Due to the small size of the bonus area, you can manipulate the lightning to constantly strike in roughly the same spot by jumping back and forth while grabbing bananas. | ||
| + | *An alternative strategy in the 2nd bonus is to constantly do big jumps from side to side, to manipulate the lightning to strike on the edges of the screen. | ||
| + | |||
| + | <div class="toccolours mw-collapsible mw-collapsed" style="width:600px"> | ||
| + | '''MORE STRATS''' | ||
| + | <div class="mw-collapsible-content">{{#ev:youtube|4nsPiCyIn7o|560||https://youtu.be/4nsPiCyIn7o}} | ||
| + | '''Notes''' | ||
| + | *Both faster strats for the first bonus are precise and not recommended unless you are consistent. | ||
| + | *The alternative ending is the same as detailed in [[Lightning Lookout#Optimal|any%]]. | ||
| + | *The faster ending is approximately 0.45s faster, but scary. After the lightning breaks the barrel, briefly release right, then repress right to start your roll and jump over the Buzzer. Roll as soon as you land, jump and start a hover. Again briefly release right when you're between the two red Buzzers to manipulate the next lightning strike. | ||
| + | </div> | ||
| + | </div> | ||
| + | |||
| + | ===Green banana locations=== | ||
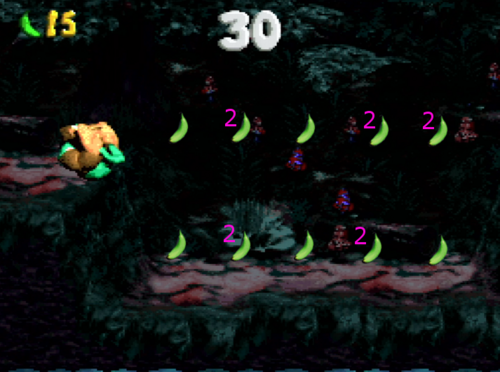
| + | [[File:greenbanana14.png|500px]] | ||
Latest revision as of 00:05, 24 September 2022
 | |
| Game | Donkey Kong Country 3 |
|---|---|
| World name | KAOS Kore |
| Level name | Lightning Lookout |
| Previous level | Sewer Stockpile |
| Next level | Koindozer Klamber 103 |
Optimal
Notes
- Much of the lightning manipulation is the same as any%. A few spots are different due to damage boosting in different places and entering/exiting bonuses.
- At 0:20, if you move too quickly to the right after the red Buzzers have moved out of the way, the next lightning can strike above the pool of water. This can cause you to get hit as you swim towards the first bonus.
- The hitboxes on the beetles in the first bonus can be nasty. Jump out of the water quite far left of them to avoid getting hit.
- For the d-boost to get the keg starting at 0:46, hit the bird near its centre, then hold B+Y+Right to reach the 2nd bird.
- Follow the movement after getting the keg very closely to manip the lightning to strike on top of the DK barrel after halfway
- The lightning in the 2nd bonus uses the same tracking mechanism as the rest of the level. Due to the small size of the bonus area, you can manipulate the lightning to constantly strike in roughly the same spot by jumping back and forth while grabbing bananas.
- An alternative strategy in the 2nd bonus is to constantly do big jumps from side to side, to manipulate the lightning to strike on the edges of the screen.
MORE STRATS
Notes
- Both faster strats for the first bonus are precise and not recommended unless you are consistent.
- The alternative ending is the same as detailed in any%.
- The faster ending is approximately 0.45s faster, but scary. After the lightning breaks the barrel, briefly release right, then repress right to start your roll and jump over the Buzzer. Roll as soon as you land, jump and start a hover. Again briefly release right when you're between the two red Buzzers to manipulate the next lightning strike.
