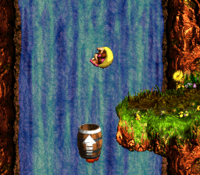
Difference between revisions of "Rocket Barrel Ride"
Cryptonberry (talk | contribs) |
|||
| (One intermediate revision by one other user not shown) | |||
| Line 16: | Line 16: | ||
Notes: | Notes: | ||
*[[DKC3_Tricks#Damage_Boosting Damage Boosting | Damage Boosting]] | *[[DKC3_Tricks#Damage_Boosting Damage Boosting | Damage Boosting]] | ||
| + | *At 0:22, to consistently skip the bee and not slipping onto it, hold right and spam B+Y. | ||
*At the end, jumping under the bee is hard to get damageless, but if you do, it's not that big of a deal. | *At the end, jumping under the bee is hard to get damageless, but if you do, it's not that big of a deal. | ||
*In the Japanese version, the last bee have a different pattern which makes it impossible to pass directly from the barrel. | *In the Japanese version, the last bee have a different pattern which makes it impossible to pass directly from the barrel. | ||
| Line 23: | Line 24: | ||
*1:14 You want to take damage on this bee here so you remain solo Dixie for the next stage. | *1:14 You want to take damage on this bee here so you remain solo Dixie for the next stage. | ||
**Make sure to start your roll or jump as early as possible to take damage early so you don't bonk with the wall with Dixie after boost. | **Make sure to start your roll or jump as early as possible to take damage early so you don't bonk with the wall with Dixie after boost. | ||
| + | |||
| + | <div class="toccolours mw-collapsible mw-collapsed" style="width:600px"> | ||
| + | '''MORE STRATS''' | ||
| + | <div class="mw-collapsible-content">{{#ev:youtube|BJ53eoBZ2kU|560||https://www.youtube.com/watch?v=BJ53eoBZ2kU}} | ||
| + | |||
| + | *This 2-1 Jump saves about 0.25 seconds | ||
| + | |||
| + | </div> | ||
| + | </div> | ||
| + | |||
[[Category:Rocket Barrel Ride]] | [[Category:Rocket Barrel Ride]] | ||
[[Category:Cotton Top Cove]] | [[Category:Cotton Top Cove]] | ||
Latest revision as of 00:03, 4 June 2022
 | |
| Game | Donkey Kong Country 3 |
|---|---|
| World name | Cotton Top Cove |
| Level name | Rocket Barrel Ride |
| Previous level | Bazza's Blockade |
| Next level | Kreeping Klasps |
Difficulty:
- Safe: 4/10
- Optimal: 5/10
Any%
Safe
Notes:
- Damage Boosting
- At 0:22, to consistently skip the bee and not slipping onto it, hold right and spam B+Y.
- At the end, jumping under the bee is hard to get damageless, but if you do, it's not that big of a deal.
- In the Japanese version, the last bee have a different pattern which makes it impossible to pass directly from the barrel.
Optimal (U)
- 1:14 You want to take damage on this bee here so you remain solo Dixie for the next stage.
- Make sure to start your roll or jump as early as possible to take damage early so you don't bonk with the wall with Dixie after boost.
MORE STRATS
- This 2-1 Jump saves about 0.25 seconds