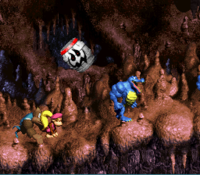
Creepy Caverns
 | |
| Game | Donkey Kong Country 3 |
|---|---|
| World name | KAOS Kore |
| Level name | Creepy Caverns |
| Previous level | Konveyor Rope Klash |
| Next level | Lightning Lookout |
Difficulty:
- Safe: 6/10
- Optimal: 8/10
- Optimal alternative: 10/10
Contents
Any%
Safe
Notes:
- The white barrels are random, which makes it a huge pain!
Optimal
Notes:
- Bad luck can add 10+ seconds. This video focuses more on the platforming.
- Note on ghost barrel RNG:
- RNG is decided the frame you enter the level.
- Not all ghost barrels have the same chances of giving perfect luck. As an example, the 3rd ghost barrel has a 66% chance of giving perfect luck, while the chances of the 1st ghost barrel giving perfect luck is much lower.
- The worst possible luck for all the ghost barrels are 4-4-5-5-3-4 respectively. Keeping this in mind, you can preemptively jump into a ghost barrel if you're getting luck this bad.
- At 0:29, you need optimal movement to reach the next ghost barrel before it disappears.
- Remember to glide into the ghost barrel at 0:32 if it is facing the correct direction.
- Getting in between the ghost barrel at 0:36 can be tricky. After leaving the barrel at 0:35, start a roll and do a tiny jump when Dixie is under the Banana bunch. Then, simply buffer a glide (glide at the peak of your jump).
- The movement at 0:53 sets you up to skip a ghost barrel cycle. Positioning is quite precise, as alerting the 3rd green barrel too early will cause problems.
- The ghost barrel at 1:08 can be reached if it is initially facing the correct direction. This is much more difficult on U than it is here, on J.
Optimal alternative
Notes:
- This route uses different Kong order for 7-1, 7-2, and 7-3. Please refer to Optimal alternative for those levels as well
- (00:30) The wiggle here will cause the bee to hover slightly higher so Kiddy can clear the gap
- The jump must be very, very short. An alternative controller grip may be recommended for the small B press
- (00:58) Team-ups and throws are done to decrease lag when entering the Ghost Barrels with two Kongs
- (00:30) The wiggle here will cause the bee to hover slightly higher so Kiddy can clear the gap
MORE STRATS
Notes:
- visualcues
- Don't release y as you land from the hovers. If you do, dixie will lose momentum and you'll get bopped.
- For the last roll if u start the hover close to the ground you get a quick roll.
Notes:
- This route uses both Kongs. It can be slightly faster than Solo Kiddy with the worst RNG, but otherwise it is significantly slower due to two Kong barrel loading. Recommended for situational use
- (00:10) A 2-1 Jump can be used to avoid using this 1st ghost barrel
- (00:15) Zip
- Align the back of Kiddy's foot with the stone on the ground. Jump three times. This should set up the Krumple
- (00:33) Team-ups and throws are done to decrease lag when entering the Ghost Barrels with two Kongs