Difference between revisions of "Arich's Ambush"
m (→Optimal) |
m (→Optimal) |
||
| Line 24: | Line 24: | ||
*For the third and fourth hits you won't need to jump out of your fall but just fall and throw before landing. | *For the third and fourth hits you won't need to jump out of your fall but just fall and throw before landing. | ||
*Grabbing the patch from underneath is the most optimal, to achieve this it's best to try and jump during the sound of him falling. | *Grabbing the patch from underneath is the most optimal, to achieve this it's best to try and jump during the sound of him falling. | ||
| + | *Arich tends to have irregular patterns at times even with similar or same movement, so you'll have to adjust how you throw but sometimes you can't help the inevitable World 2 reset with this boss. | ||
[[Category:Arich's Ambush]] | [[Category:Arich's Ambush]] | ||
[[Category:Kremwood Forest]] | [[Category:Kremwood Forest]] | ||
Revision as of 23:12, 20 April 2016
 | |
| Game | Donkey Kong Country 3 |
|---|---|
| World name | Kremwood Forest |
| Level name | Bobbing Barrel Brawl |
| Previous level | Bobbing Barrel Brawl |
| Next level | Mekanos |
Difficulty:
- Safe: 2/10
- Optimal: 9/10
Any%
Safe
Notes:
- Don't forget to drop the barrel on the ground for Arich's last pattern (holding B -> Hold Down -> Release B)
Optimal
Notes:
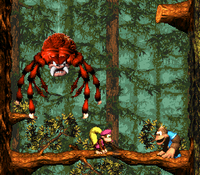
- To properly achieve hits on Arich you'll want to fall straight down off the platform above so you won't clash your barrel with legs.
- For the second hit you'll need to jump after falling to land the hit properly on Arich.
- For the third and fourth hits you won't need to jump out of your fall but just fall and throw before landing.
- Grabbing the patch from underneath is the most optimal, to achieve this it's best to try and jump during the sound of him falling.
- Arich tends to have irregular patterns at times even with similar or same movement, so you'll have to adjust how you throw but sometimes you can't help the inevitable World 2 reset with this boss.