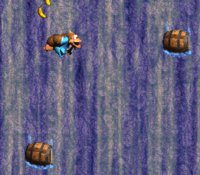
Difference between revisions of "Barrel Drop Bounce"
m (Protected "Barrel Drop Bounce" ([Edit=Allow only autoconfirmed users] (indefinite) [Move=Allow only autoconfirmed users] (indefinite))) |
m (Fixed formatting) |
||
| Line 7: | Line 7: | ||
| next = [[Krack Shot Kroc]] | | next = [[Krack Shot Kroc]] | ||
}} | }} | ||
| − | Difficulty: | + | Difficulty: |
| − | Safe : 4/10 | + | *Safe: 4/10 |
| − | MorKs : 6/10 | + | *MorKs: 6/10 |
| − | Riz : 8/10 | + | *Riz: 8/10 |
| − | + | *103%: 9/10 | |
| − | 103%: 9/10 | + | |
==Any%== | ==Any%== | ||
| − | + | ===Safe Route=== | |
| + | |||
| + | {{#ev:youtube|ga8SIY0qQ3o|560||http://www.youtube.com/watch?v=ga8SIY0qQ3o}} | ||
Notes: | Notes: | ||
*Really safe, but slow route. | *Really safe, but slow route. | ||
| − | + | ||
| + | ===MorKs's Route=== | ||
| + | {{#ev:youtube|JaEevBxlQhU|560||http://www.youtube.com/watch?v=JaEevBxlQhU}} | ||
Notes: | Notes: | ||
*I made this alternative route because Riz's can be hard for beginners. It saves at least 10 seconds on the safe one. | *I made this alternative route because Riz's can be hard for beginners. It saves at least 10 seconds on the safe one. | ||
| − | + | ||
| + | ===Riz's Route=== | ||
| + | {{#ev:youtube|vaIhktvdC8Y|560||http://www.youtube.com/watch?v=vaIhktvdC8Y}} | ||
Notes: | Notes: | ||
| − | *0:32 : Be careful to be at the left of the DK barrel before team-throwing or else you won't make it on the upper platform. | + | *0:32: Be careful to be at the left of the DK barrel before team-throwing or else you won't make it on the upper platform. |
| − | *0:35 : Before team-throwing into the upper barrel, make it past the waterfall. | + | *0:35: Before team-throwing into the upper barrel, make it past the waterfall. |
| − | *0:40 : For the two team-throws, do a mid-jump still to throw upward, then a | + | *0:40: For the two team-throws, do a mid-jump still to throw upward, then a full jump forward to throw upward-right. |
| − | + | **If you don't see the upper-right platform after the first throw, make another one on the next waterfall barrel before aiming the platform. | |
| − | *Saves up to 15 seconds over | + | *Saves up to 15 seconds over safe route. |
| + | |||
==103%== | ==103%== | ||
{{#ev:youtube|91hAK3ydpIo|560||http://www.youtube.com/watch?v=91hAK3ydpIo}} | {{#ev:youtube|91hAK3ydpIo|560||http://www.youtube.com/watch?v=91hAK3ydpIo}} | ||
Revision as of 04:26, 9 March 2016
 | |
| Game | Donkey Kong Country 3 |
|---|---|
| World name | K3 |
| Level name | Barrel Drop Bounce |
| Previous level | Tearaway Toboggan |
| Next level | Krack Shot Kroc |
Difficulty:
- Safe: 4/10
- MorKs: 6/10
- Riz: 8/10
- 103%: 9/10
Any%
Safe Route
Notes:
- Really safe, but slow route.
MorKs's Route
Notes:
- I made this alternative route because Riz's can be hard for beginners. It saves at least 10 seconds on the safe one.
Riz's Route
Notes:
- 0:32: Be careful to be at the left of the DK barrel before team-throwing or else you won't make it on the upper platform.
- 0:35: Before team-throwing into the upper barrel, make it past the waterfall.
- 0:40: For the two team-throws, do a mid-jump still to throw upward, then a full jump forward to throw upward-right.
- If you don't see the upper-right platform after the first throw, make another one on the next waterfall barrel before aiming the platform.
- Saves up to 15 seconds over safe route.
103%
Notes:
- Bear coins count: 36
- To do the Flying Drop Barrel trick, you have to jump and release Y at the same time.
- The barrel that you need to step on to get to the second bonus won’t load if you do the throw with Kiddy to go up instead of walking around to the left.