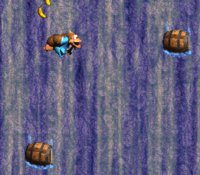
Difference between revisions of "Barrel Drop Bounce"
m |
(→Any%) |
||
| Line 14: | Line 14: | ||
==Any%== | ==Any%== | ||
| − | |||
| − | |||
| − | |||
| − | |||
| − | === | + | ===Safe=== |
{{#ev:youtube|JaEevBxlQhU|560||http://www.youtube.com/watch?v=JaEevBxlQhU}} | {{#ev:youtube|JaEevBxlQhU|560||http://www.youtube.com/watch?v=JaEevBxlQhU}} | ||
Notes: | Notes: | ||
| − | * | + | *Safe video with some unoptimal but easier team throws, forgets the last team throw all together |
| + | *this loses 10+ seconds over optimal | ||
| − | === | + | ===Optimal=== |
| − | {{#ev:youtube| | + | {{#ev:youtube|J01SUdZK15g|560||https://www.youtube.com/watch?v=J01SUdZK15g}} |
Notes: | Notes: | ||
| − | * | + | *All of the team throws besides the last one are quite easy, just copy the video for where to be standing. |
| − | * | + | *At :24 getting up the series of barrels is awkward at first, falling down loses quite a bit of time. You don't have to let go of the dpad at all jumping up them. |
| − | * | + | *Facing right at :32 when team throwing is necessary. |
| − | + | *The last team throws at :37 are hard. Try to land as high as possible and team-up instantly when you land on the barrel. Jump immediately to about half of max height, and team throw up, if done correctly you should gain quite a bit of height landing on the second barrel. | |
| − | * | + | *Find a visual cue that you can rely on to be sure you will make it up in 2 team throws, there is no shame in taking a 3rd team throw, it waste alot less time then failing to get up on the ledge in 2 throws. |
==103%== | ==103%== | ||
Revision as of 23:12, 17 April 2016
 | |
| Game | Donkey Kong Country 3 |
|---|---|
| World name | K3 |
| Level name | Barrel Drop Bounce |
| Previous level | Tearaway Toboggan |
| Next level | Krack Shot Kroc |
Difficulty:
- Safe: 4/10
- MorKs: 6/10
- Riz: 8/10
- 103%: 9/10
Contents
Any%
Safe
Notes:
- Safe video with some unoptimal but easier team throws, forgets the last team throw all together
- this loses 10+ seconds over optimal
Optimal
Notes:
- All of the team throws besides the last one are quite easy, just copy the video for where to be standing.
- At :24 getting up the series of barrels is awkward at first, falling down loses quite a bit of time. You don't have to let go of the dpad at all jumping up them.
- Facing right at :32 when team throwing is necessary.
- The last team throws at :37 are hard. Try to land as high as possible and team-up instantly when you land on the barrel. Jump immediately to about half of max height, and team throw up, if done correctly you should gain quite a bit of height landing on the second barrel.
- Find a visual cue that you can rely on to be sure you will make it up in 2 team throws, there is no shame in taking a 3rd team throw, it waste alot less time then failing to get up on the ledge in 2 throws.
103%
Notes:
- Bear coins count: 36
- To do the Flying Drop Barrel trick, you have to jump and release Y at the same time.
- The barrel that you need to step on to get to the second bonus won’t load if you do the throw with Kiddy to go up instead of walking around to the left.