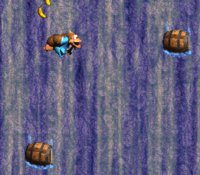
Difference between revisions of "Barrel Drop Bounce"
(→103%) |
Cryptonberry (talk | contribs) |
||
| Line 10: | Line 10: | ||
*Safe: 3/10 | *Safe: 3/10 | ||
*Optimal: 5/10 | *Optimal: 5/10 | ||
| − | |||
| − | |||
==Any%== | ==Any%== | ||
| Line 27: | Line 25: | ||
*The last team throws at :37 are hard. Try to land as high as possible and team-up instantly when you land on the barrel. Jump immediately to about half of max height, and team throw up, if done correctly you should gain quite a bit of height landing on the second barrel. | *The last team throws at :37 are hard. Try to land as high as possible and team-up instantly when you land on the barrel. Jump immediately to about half of max height, and team throw up, if done correctly you should gain quite a bit of height landing on the second barrel. | ||
*Find a visual cue that you can rely on to be sure you will make it up in 2 team throws, there is no shame in taking a 3rd team throw, it waste a lot less time then failing to get up on the ledge in 2 throws. | *Find a visual cue that you can rely on to be sure you will make it up in 2 team throws, there is no shame in taking a 3rd team throw, it waste a lot less time then failing to get up on the ledge in 2 throws. | ||
| − | |||
| − | |||
| − | |||
| − | |||
| − | |||
| − | |||
| − | |||
| − | |||
| − | |||
| − | |||
| − | |||
[[Category:Barrel Drop Bounce]] | [[Category:Barrel Drop Bounce]] | ||
[[Category:K3]] | [[Category:K3]] | ||
Revision as of 00:35, 13 February 2017
 | |
| Game | Donkey Kong Country 3 |
|---|---|
| World name | K3 |
| Level name | Barrel Drop Bounce |
| Previous level | Tearaway Toboggan |
| Next level | Krack Shot Kroc |
Difficulty:
- Safe: 3/10
- Optimal: 5/10
Any%
Safe
Notes:
- Safe video with some unoptimal but easier team throws, forgets the last team throw all together
Optimal
Notes:
- All of the team throws besides the last one are quite easy, just copy the video for where to be standing.
- At :24 getting up the series of barrels is awkward at first, falling down loses quite a bit of time. You don't have to let go of the dpad at all jumping up them.
- Facing right at :32 when team throwing is necessary.
- The last team throws at :37 are hard. Try to land as high as possible and team-up instantly when you land on the barrel. Jump immediately to about half of max height, and team throw up, if done correctly you should gain quite a bit of height landing on the second barrel.
- Find a visual cue that you can rely on to be sure you will make it up in 2 team throws, there is no shame in taking a 3rd team throw, it waste a lot less time then failing to get up on the ledge in 2 throws.