Difference between revisions of "Clapper's Cavern"
(→Any%) |
Cryptonberry (talk | contribs) m (→Any%) |
||
| (14 intermediate revisions by 5 users not shown) | |||
| Line 1: | Line 1: | ||
| − | '' | + | {{Infobox level |
| − | + | | image = ClappersCavern.png | |
| + | | game = Donkey Kong Country 2 | ||
| + | | world_name = [[K.Rool's Keep]] | ||
| + | | level_name = Clapper's Cavern | ||
| + | | previous = [[Castle Crush]] | ||
| + | | next = [[Chain Link Chamber]] | ||
| + | }} | ||
| + | Difficulty: | ||
| + | *Safe: 4/10 | ||
| + | *Optimal: 5/10 | ||
==Any%== | ==Any%== | ||
| + | ===Safe=== | ||
| + | {{#ev:youtube|CoueYs1AGFE|560||https://www.youtube.com/watch?v=CoueYs1AGFE}} | ||
| + | '''Notes''' | ||
| + | *Be careful of the very first Clapper, as it is very easy to trigger him with a roll. Just jumping there might be the safest option. | ||
| + | *For the second Clapper, hit him on his left. This will guarantee that the two rats and beetle face towards you, allowing for optimal rolls. | ||
| + | *Switch kongs at the very top of the water section. This will bypass the usual switching freeze frames, and the Spiny will then be in a position where can you roll through him. | ||
| + | *Aim for the best movement possible once you have invulnerability, so that you can clear all the bees. With proper movement you can also kill the final Krusha, but jumping over him is foolproof. | ||
| + | **If you are not comfortable clearing all the bees, you can throw the barrel found near the end to kill everything. | ||
| − | {{#ev:youtube| | + | ===Optimal=== |
| − | + | {{#ev:youtube|DHtH9Zp3KC8|560||https://www.youtube.com/watch?v=DHtH9Zp3KC8}} | |
| − | + | '''Additions''' | |
| − | + | *At 0:11, glide over both the bee and the Krusha. | |
| − | + | *At 0:13, jump before rolling to gain momentum. | |
| − | + | *For the water section, keep the fish until the end, and dismount just before the signpost (Saves ~.4s). | |
| − | + | *At 0:39, slide under the bee. | |
| − | + | *Throwing Your Girlfriend for the invulnerability is slightly harder to setup, but gives you a much more lenient window to clear all the enemies at the end (Saves ~.6s). | |
| − | |||
| − | |||
| − | |||
| − | |||
| − | |||
| − | |||
[[Category:K.Rool's Keep]] | [[Category:K.Rool's Keep]] | ||
[[Category:Level]] | [[Category:Level]] | ||
Latest revision as of 05:43, 6 January 2019
 | |
| Game | Donkey Kong Country 2 |
|---|---|
| World name | K.Rool's Keep |
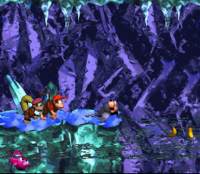
| Level name | Clapper's Cavern |
| Previous level | Castle Crush |
| Next level | Chain Link Chamber |
Difficulty:
- Safe: 4/10
- Optimal: 5/10
Any%
Safe
Notes
- Be careful of the very first Clapper, as it is very easy to trigger him with a roll. Just jumping there might be the safest option.
- For the second Clapper, hit him on his left. This will guarantee that the two rats and beetle face towards you, allowing for optimal rolls.
- Switch kongs at the very top of the water section. This will bypass the usual switching freeze frames, and the Spiny will then be in a position where can you roll through him.
- Aim for the best movement possible once you have invulnerability, so that you can clear all the bees. With proper movement you can also kill the final Krusha, but jumping over him is foolproof.
- If you are not comfortable clearing all the bees, you can throw the barrel found near the end to kill everything.
Optimal
Additions
- At 0:11, glide over both the bee and the Krusha.
- At 0:13, jump before rolling to gain momentum.
- For the water section, keep the fish until the end, and dismount just before the signpost (Saves ~.4s).
- At 0:39, slide under the bee.
- Throwing Your Girlfriend for the invulnerability is slightly harder to setup, but gives you a much more lenient window to clear all the enemies at the end (Saves ~.6s).