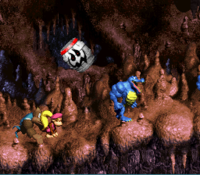
Difference between revisions of "Creepy Caverns"
Cryptonberry (talk | contribs) |
Cryptonberry (talk | contribs) (→Optimal) |
||
| Line 18: | Line 18: | ||
===Optimal=== | ===Optimal=== | ||
| − | {{#ev:youtube| | + | {{#ev:youtube|09Zr7NOCTJ4|560||https://www.youtube.com/watch?v=09Zr7NOCTJ4}} |
Notes: | Notes: | ||
| − | * | + | *Bad luck can add 10+ seconds. This video focuses more on the platforming. |
| − | *At 0: | + | *At 0:29, you need optimal movement to reach the next ghost barrel before it disappears. |
| − | * | + | *Getting in between the ghost barrel at 0:36 can be tricky. After leaving the barrel at 0:35, start a roll and do a tiny jump when Dixie is under the Banana bunch. Then, simply buffer a glide (glide at the peak of your jump). |
| − | *The movement at 0: | + | *The movement at 0:53 sets you up to skip a ghost barrel cycle. Positioning is quite precise, as alerting the 3rd green barrel too early will cause problems. |
| − | *The ghost barrel at 1: | + | *The ghost barrel at 1:08 can be reached if it is initially facing the correct direction. This is much more difficult on U than it is here, on J. |
*Sacrifice Dixie at the end and take the exact route you see. You can still get pulled into the ghost barrels with I-frames. | *Sacrifice Dixie at the end and take the exact route you see. You can still get pulled into the ghost barrels with I-frames. | ||
Revision as of 07:40, 7 May 2017
 | |
| Game | Donkey Kong Country 3 |
|---|---|
| World name | KAOS Kore |
| Level name | Creepy Caverns |
| Previous level | Konveyor Rope Klash |
| Next level | Lightning Lookout |
Difficulty:
- Safe: 6/10
- Optimal: 8/10
Any%
Safe
Notes:
- The white barrels are random, which makes it a huge pain!
Optimal
Notes:
- Bad luck can add 10+ seconds. This video focuses more on the platforming.
- At 0:29, you need optimal movement to reach the next ghost barrel before it disappears.
- Getting in between the ghost barrel at 0:36 can be tricky. After leaving the barrel at 0:35, start a roll and do a tiny jump when Dixie is under the Banana bunch. Then, simply buffer a glide (glide at the peak of your jump).
- The movement at 0:53 sets you up to skip a ghost barrel cycle. Positioning is quite precise, as alerting the 3rd green barrel too early will cause problems.
- The ghost barrel at 1:08 can be reached if it is initially facing the correct direction. This is much more difficult on U than it is here, on J.
- Sacrifice Dixie at the end and take the exact route you see. You can still get pulled into the ghost barrels with I-frames.