Difference between revisions of "Red-Hot Ride 102"
(→Optimal) |
(→Optimal) |
||
| (8 intermediate revisions by 2 users not shown) | |||
| Line 9: | Line 9: | ||
Difficulty: | Difficulty: | ||
*2 Visits: 6/10 | *2 Visits: 6/10 | ||
| − | *Optimal: | + | *Optimal: 8/10 |
===2 Visits=== | ===2 Visits=== | ||
| Line 46: | Line 46: | ||
===Optimal=== | ===Optimal=== | ||
| − | {{#ev:youtube| | + | {{#ev:youtube|G0XE7uUfbjw|560||https://youtu.be/G0XE7uUfbjw}} |
*0:11 - you can actually get bounced off the Kruncha onto the Rambi box. | *0:11 - you can actually get bounced off the Kruncha onto the Rambi box. | ||
| − | *0:43 - Move Your Signpost TM | + | *0:43 - Move Your Signpost TM (check the backups , the beetle can survive the clash). |
| − | *1: | + | *1:11 - Rambi Fly |
| − | *1: | + | *1:19 - Check the "backups" video below for if you land on the slope, or the warpless vid |
| − | + | ||
| − | * | + | <div class="toccolours mw-collapsible mw-collapsed" style="width:600px"> |
| + | '''Flying Rambi Backups / Beetle Clash Backup''' | ||
| + | <div class="mw-collapsible-content"> | ||
| + | {{#ev:youtube|nO12f7gqK-0|560||https://youtu.be/nO12f7gqK-0}} | ||
| + | |||
| + | {{#ev:youtube|Gud-i9O-wc8|560||https://youtu.be/Gud-i9O-wc8}} | ||
| + | *If the beetle survives the clash; Just face left for a bit to despawn the beetle before putting the null object down. | ||
Latest revision as of 02:38, 8 October 2023
 | |
| Game | Donkey Kong Country 2 |
|---|---|
| World name | Crocodile Cauldron |
| Level name | Red-Hot Ride |
| Previous level | Lava Lagoon |
| Next level | Squawk's Shaft |
Difficulty:
- 2 Visits: 6/10
- Optimal: 8/10
2 Visits
Notes
- Rhinos don't fly.
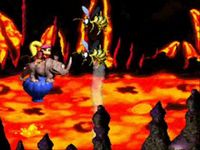
- The first jump onto the bees needs to be timed roughly when all of Rambi's legs are over the spot the barrel sits on.
- Perform a Rambi Double Jump just before the trail of smoke after the third set of bees.
- Standing on the left side of the balloon with Rambi will make it a lot easier to jump out of the charge.
- In the second bonus, do the first throw as the first star is collected, then do another throw as soon as possible. Avoid missing stars on the left side!
- The BigBoi to collect the DK Coin looks risky, but it will be easy to execute using the visual cues provided below. Getting the midpoint barrel is a good safety when starting out.
- Alternatively, you may opt to do the developer intended Super Safe DK Coin Grab, at the cost of 5s.
DK Coin BigBoi Tutorial
- Be holding right the entire time, but NOT up+right.
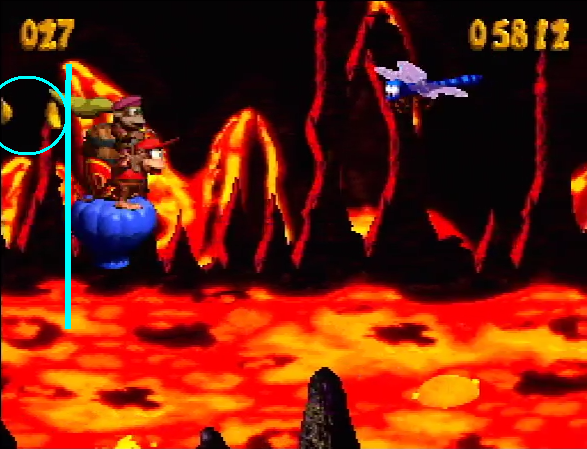
- Full jump after the balloon has passed those two bananas.
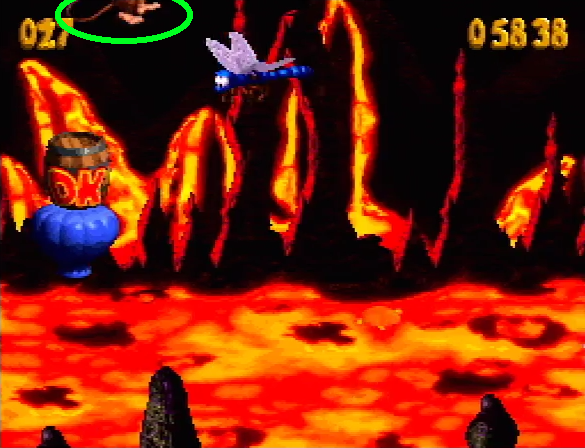
- Throw Dixie at the peak of the jump. Diddy should be mostly offscreen.
- Keep holding B after throwing.
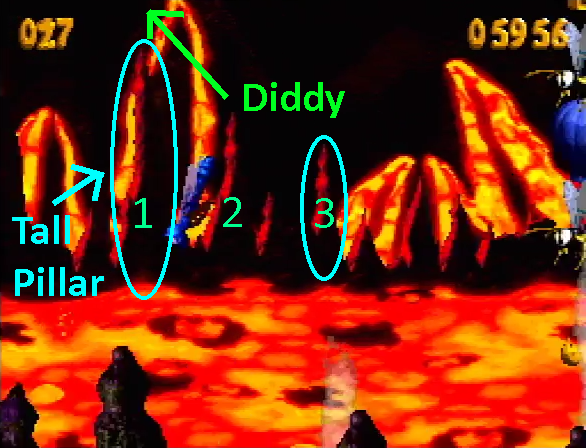
- Repress and hold B when Diddy is over the tall pillar, as pictured.
- Throw Dixie again when over the 3rd tallest pillar, numbered 3 in the picture.
- Press start and select after collecting the DK Coin.
Super Safe DK Coin Grab
- Self explanatory.
Optimal
- 0:11 - you can actually get bounced off the Kruncha onto the Rambi box.
- 0:43 - Move Your Signpost TM (check the backups , the beetle can survive the clash).
- 1:11 - Rambi Fly
- 1:19 - Check the "backups" video below for if you land on the slope, or the warpless vid
Flying Rambi Backups / Beetle Clash Backup
- If the beetle survives the clash; Just face left for a bit to despawn the beetle before putting the null object down.


