Difference between revisions of "Tidal Trouble 103"
Cryptonberry (talk | contribs) |
|||
| (8 intermediate revisions by 2 users not shown) | |||
| Line 1: | Line 1: | ||
| + | {{Infobox level | ||
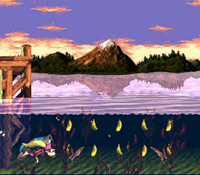
| + | | image = Tidal Trouble.png | ||
| + | | game = Donkey Kong Country 3 | ||
| + | | world_name = [[Lake Orangatanga]] | ||
| + | | level_name = Tidal Trouble | ||
| + | | previous = [[Smuggler's Cove]] | ||
| + | | next = [[Skidda's Row 103]] | ||
| + | }} | ||
| + | |||
===Optimal=== | ===Optimal=== | ||
| − | {{#ev:youtube| | + | {{#ev:youtube|edZvpIfIzmA|560||https://youtu.be/edZvpIfIzmA}} |
'''Notes''' | '''Notes''' | ||
| − | *Bear | + | *Bear coin count: 5 |
| − | *Kiddy can bounce on the water by rolling into it and pressing B when you touch the surface. On the first pair of bounces, you can hold down to make them shorter and reach the platform sooner, making your next roll longer | + | *Kiddy can bounce on the water by rolling into it and pressing B when you touch the surface. On the first pair of bounces, you can hold down to make them shorter and reach the platform sooner, making your next roll longer. |
*Try to be out of the water as much as possible. It pushes you to the left, which slows you down. | *Try to be out of the water as much as possible. It pushes you to the left, which slows you down. | ||
*After the 1st bonus, switch to Dixie. | *After the 1st bonus, switch to Dixie. | ||
| + | *Whenever you land in the water after a hover, make sure to release Y before hitting the water. Otherwise Dixie can't jump out of the water instantly. | ||
*The hover to the 2nd bonus is free. | *The hover to the 2nd bonus is free. | ||
*Simply hold right and Y to clear the second bonus. | *Simply hold right and Y to clear the second bonus. | ||
| + | *The jump between the bee and the water at 1:21 can be difficult. Go through the water if necessary or damage boost (which means Kiddy will be in front in Skidda's Row). | ||
| + | *Bouncing on the Knocka at 1:24 reduces the lag it causes when you have 2 kongs. | ||
| + | |||
| + | <div class="toccolours mw-collapsible mw-collapsed" style="width:600px"> | ||
| + | '''ALTERNATIVE ENDING (DAMAGE BOOST)''' | ||
| + | <div class="mw-collapsible-content">{{#ev:youtube|ba-FBXSk4zE|560||https://youtu.be/ba-FBXSk4zE}} | ||
| + | '''Notes''' | ||
| + | *This ending is slightly faster if you plan to do Murky Mill in two entries. However, since a sizable portion of Skidda's Row is played with 1 kong, it's also slightly riskier. | ||
| + | </div> | ||
| + | </div> | ||
| + | |||
| + | ===Optimal Alternative=== | ||
| + | {{#ev:youtube|Y8jwJ0d8Kj8|560||https://youtu.be/Y8jwJ0d8Kj8}} | ||
| + | '''Notes''' | ||
| + | *Bear coin count: 5 | ||
| + | *Damage boosting before entering the first bonus reduces lag later in the stage. | ||
| + | *Whenever you land in the water after a hover, make sure to release Y before hitting the water. Otherwise Dixie can't jump out of the water instantly. | ||
| + | *The jump between the bee and the water at 1:18 can be difficult. Go through the water if necessary. | ||
| + | *Solo Dixie route is only faster if you plan to do Murky Mill in a single visit. | ||
Latest revision as of 19:08, 30 December 2022
 | |
| Game | Donkey Kong Country 3 |
|---|---|
| World name | Lake Orangatanga |
| Level name | Tidal Trouble |
| Previous level | Smuggler's Cove |
| Next level | Skidda's Row 103 |
Optimal
Notes
- Bear coin count: 5
- Kiddy can bounce on the water by rolling into it and pressing B when you touch the surface. On the first pair of bounces, you can hold down to make them shorter and reach the platform sooner, making your next roll longer.
- Try to be out of the water as much as possible. It pushes you to the left, which slows you down.
- After the 1st bonus, switch to Dixie.
- Whenever you land in the water after a hover, make sure to release Y before hitting the water. Otherwise Dixie can't jump out of the water instantly.
- The hover to the 2nd bonus is free.
- Simply hold right and Y to clear the second bonus.
- The jump between the bee and the water at 1:21 can be difficult. Go through the water if necessary or damage boost (which means Kiddy will be in front in Skidda's Row).
- Bouncing on the Knocka at 1:24 reduces the lag it causes when you have 2 kongs.
ALTERNATIVE ENDING (DAMAGE BOOST)
Notes
- This ending is slightly faster if you plan to do Murky Mill in two entries. However, since a sizable portion of Skidda's Row is played with 1 kong, it's also slightly riskier.
Optimal Alternative
Notes
- Bear coin count: 5
- Damage boosting before entering the first bonus reduces lag later in the stage.
- Whenever you land in the water after a hover, make sure to release Y before hitting the water. Otherwise Dixie can't jump out of the water instantly.
- The jump between the bee and the water at 1:18 can be difficult. Go through the water if necessary.
- Solo Dixie route is only faster if you plan to do Murky Mill in a single visit.