Difference between revisions of "Krack Shot Kroc"
Cryptonberry (talk | contribs) |
|||
| Line 10: | Line 10: | ||
*Safe: 5/10 | *Safe: 5/10 | ||
*Optimal: 8/10 | *Optimal: 8/10 | ||
| + | *Optimal alternative: 10/10 | ||
==Any%== | ==Any%== | ||
| Line 30: | Line 31: | ||
[[Category:Krack Shot Krock]] | [[Category:Krack Shot Krock]] | ||
[[Category:K3]] | [[Category:K3]] | ||
| + | |||
| + | ===Optimal alternative=== | ||
| + | {{#ev:youtube|as3FaMeBBkg|560||https://www.youtube.com/watch?v=xZF1qhFPXss&ab_channel=laff_}} | ||
| + | Notes: | ||
| + | |||
| + | Under specific conditions, Squitter can create platforms at a much faster rate with less cooldown. | ||
| + | |||
| + | Fast Webs 1 (00:30) | ||
| + | *Briefly release the d-pad while jumping over the two Spinies (00:22) | ||
| + | *This is not required, but will make the fast webs more consistent. | ||
| + | |||
| + | Fast Webs 2 (00:53) | ||
| + | *Defeat the 3 Re-Koils while Squitter is very close to them. | ||
| + | *Drop off the platform and take damage in the milkshake. Jump when Squitter's eyes are aligned underneath the Red Buzz's eyes. | ||
| + | *Jump and create the Platform 1 as soon as Squitter touches the 2nd Red Buzz. | ||
| + | *Walk off the edge of Platform 1 and create the Platform 2 under the overhang. | ||
| + | *Walk off the edge of Platform 2, turn, then quickly create Platform 3 against the wall. | ||
| + | *Turn again and quickly create Platform 4 | ||
| + | |||
| + | Fast Webs 3 (1:00) | ||
| + | *Defeat the enemies using this specific timing, the green Buzz is the most important. | ||
| + | *There is a railing underneath a pink light - Wait until Squitter passes this to shoot the 3rd attack at the green Buzz. | ||
| + | *After defeating the Buzz, jump and quickly create a platform, but wait a moment. | ||
| + | *Jump when the defeated Buzz has exited the screen about halfway. | ||
| + | *Create Platform 2 as soon as the Buzz has left the screen. | ||
| + | *These steps will set up the Fast Web state for Platforms 3 and 4. | ||
Revision as of 23:27, 3 June 2022
 | |
| Game | Donkey Kong Country 3 |
|---|---|
| World name | K3 |
| Level name | Krack Shot Krock |
| Previous level | Barrel Drop Bounce |
| Next level | Lemguin Lunge |
Difficulty:
- Safe: 5/10
- Optimal: 8/10
- Optimal alternative: 10/10
Contents
Any%
Safe
Notes:
- Squitter Instant Platforms
- Just be careful and remember that you can stand in the little gap between "Strawberry-milkshake pools" and not get hurt
Optimal
Notes:
- Jumping and landing in the middle of the pink lava pools is easier then it looks, there is quite a bit of room before you get hit, get comfortable with it.
- At :27 jump as close to as possible to the guy before bouncing on him, it makes getting uptop in 1 web easier.
- Every time you let go of the d-pad or y button making instant platforms you lose time, try to minimize this.
- Squitter Instant Platforms
- Damage Boosting
Optimal alternative
Notes:
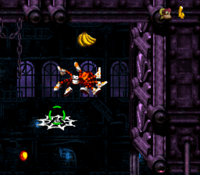
Under specific conditions, Squitter can create platforms at a much faster rate with less cooldown.
Fast Webs 1 (00:30)
- Briefly release the d-pad while jumping over the two Spinies (00:22)
- This is not required, but will make the fast webs more consistent.
Fast Webs 2 (00:53)
- Defeat the 3 Re-Koils while Squitter is very close to them.
- Drop off the platform and take damage in the milkshake. Jump when Squitter's eyes are aligned underneath the Red Buzz's eyes.
- Jump and create the Platform 1 as soon as Squitter touches the 2nd Red Buzz.
- Walk off the edge of Platform 1 and create the Platform 2 under the overhang.
- Walk off the edge of Platform 2, turn, then quickly create Platform 3 against the wall.
- Turn again and quickly create Platform 4
Fast Webs 3 (1:00)
- Defeat the enemies using this specific timing, the green Buzz is the most important.
- There is a railing underneath a pink light - Wait until Squitter passes this to shoot the 3rd attack at the green Buzz.
- After defeating the Buzz, jump and quickly create a platform, but wait a moment.
- Jump when the defeated Buzz has exited the screen about halfway.
- Create Platform 2 as soon as the Buzz has left the screen.
- These steps will set up the Fast Web state for Platforms 3 and 4.