Difference between revisions of "Skidda's Row 103"
| Line 7: | Line 7: | ||
| next = [[Murky Mill 103]] | | next = [[Murky Mill 103]] | ||
}} | }} | ||
| − | ===Optimal=== | + | ===Optimal - Kiddy in front=== |
{{#ev:youtube|hmvoOAch8xg|560||https://www.youtube.com/watch?v=hmvoOAch8xg}} | {{#ev:youtube|hmvoOAch8xg|560||https://www.youtube.com/watch?v=hmvoOAch8xg}} | ||
'''Notes''' | '''Notes''' | ||
*Bear coins count: 8 | *Bear coins count: 8 | ||
| + | *[http://dkcspeedruns.com/DKC3_Tricks#Krimp_Just_Defend Just Defend] | ||
*If you miss the first bear coin, don't worry, there is plenty of back up! | *If you miss the first bear coin, don't worry, there is plenty of back up! | ||
*Rolling into the Skiddas on the house at the second bonus can be tough, especially with Dixie. | *Rolling into the Skiddas on the house at the second bonus can be tough, especially with Dixie. | ||
| − | ===Dixie | + | ===Optimal - Dixie in front=== |
{{#ev:youtube|vBx8zMcYHbs|560||https://www.youtube.com/watch?v=vBx8zMcYHbs}} | {{#ev:youtube|vBx8zMcYHbs|560||https://www.youtube.com/watch?v=vBx8zMcYHbs}} | ||
'''Notes''' | '''Notes''' | ||
| − | *At the start of the level or after bonuses, it's faster to start moving with a jump rather than a roll because snow. | + | *Bear coins count: 8 |
| − | * | + | *[http://dkcspeedruns.com/DKC3_Tricks#Krimp_Just_Defend Just Defend] |
| − | + | *Having Dixie in front from Tidal Trouble until Murky Mill is faster, but slightly more difficult. If you're solo Dixie after Tidal Trouble, remain solo Dixie throughout this stage. | |
| + | *At the start of the level or after bonuses, it's faster to start moving with a jump rather than a roll because snow physics make you accelerate slower. | ||
| + | *In the first bonus, the second roll (0:24) can be hard to pull off without slowing down or wiggling beforehand. | ||
*Doing a full jump at 00:45 makes it easier to get a roll after landing on the roof. | *Doing a full jump at 00:45 makes it easier to get a roll after landing on the roof. | ||
*This level is surprisingly hard to perform optimally, snow+ledges are a bad combo. | *This level is surprisingly hard to perform optimally, snow+ledges are a bad combo. | ||
| + | |||
| + | <div class="toccolours mw-collapsible mw-collapsed" style="width:600px"> | ||
| + | '''2ND BONUS ENTRY ALTERNATIVE''' | ||
| + | <div class="mw-collapsible-content">{{#ev:youtube|_0TNG6ChBWk|560||https://youtu.be/_0TNG6ChBWk}} | ||
| + | '''Notes''' | ||
| + | *Hovering and holding Y upon landing can get you an instant roll if executed correctly (as shown in the video), potentially making entering the second bonus easier. | ||
| + | </div> | ||
| + | </div> | ||
Revision as of 22:40, 10 April 2020
 | |
| Game | Donkey Kong Country 3 |
|---|---|
| World name | Lake Orangatanga |
| Level name | Skidda's Row |
| Previous level | Tidal Trouble 103 |
| Next level | Murky Mill 103 |
Optimal - Kiddy in front
Notes
- Bear coins count: 8
- Just Defend
- If you miss the first bear coin, don't worry, there is plenty of back up!
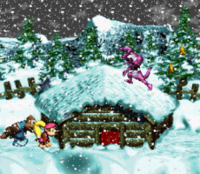
- Rolling into the Skiddas on the house at the second bonus can be tough, especially with Dixie.
Optimal - Dixie in front
Notes
- Bear coins count: 8
- Just Defend
- Having Dixie in front from Tidal Trouble until Murky Mill is faster, but slightly more difficult. If you're solo Dixie after Tidal Trouble, remain solo Dixie throughout this stage.
- At the start of the level or after bonuses, it's faster to start moving with a jump rather than a roll because snow physics make you accelerate slower.
- In the first bonus, the second roll (0:24) can be hard to pull off without slowing down or wiggling beforehand.
- Doing a full jump at 00:45 makes it easier to get a roll after landing on the roof.
- This level is surprisingly hard to perform optimally, snow+ledges are a bad combo.
2ND BONUS ENTRY ALTERNATIVE
Notes
- Hovering and holding Y upon landing can get you an instant roll if executed correctly (as shown in the video), potentially making entering the second bonus easier.