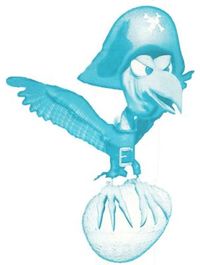
Difference between revisions of "Kreepy Krow"
Cryptonberry (talk | contribs) m (→Optimal) |
|||
| (13 intermediate revisions by 2 users not shown) | |||
| Line 15: | Line 15: | ||
{{#ev:youtube|3zhCzvB4yZc|560||https://www.youtube.com/watch?v=3zhCzvB4yZc}} | {{#ev:youtube|3zhCzvB4yZc|560||https://www.youtube.com/watch?v=3zhCzvB4yZc}} | ||
'''Notes''' | '''Notes''' | ||
| − | *Every barrel spawn is random, so seconds can be lost on RNG in this fight. | + | *Every barrel spawn is random, so seconds can be lost on RNG in this fight. Mid Right Right is the best possible luck. |
*The 2nd round is the most important in terms of RNG, since getting the infamous Left spawn is much slower. | *The 2nd round is the most important in terms of RNG, since getting the infamous Left spawn is much slower. | ||
*Standing at the higher platform for the fanfare saves ~2 frames over the lower platform. Save the frames! | *Standing at the higher platform for the fanfare saves ~2 frames over the lower platform. Save the frames! | ||
| Line 22: | Line 22: | ||
'''Mid Mid Right'''{{#ev:youtube|FPuQ8ndY8UA|560||https://www.youtube.com/watch?v=FPuQ8ndY8UA}} | '''Mid Mid Right'''{{#ev:youtube|FPuQ8ndY8UA|560||https://www.youtube.com/watch?v=FPuQ8ndY8UA}} | ||
'''Notes''' | '''Notes''' | ||
| − | *Reaching the rope at 0:18 can be difficult. | + | *The most optimal luck is Mid Right Right. This video focuses on movement. |
| + | *Reaching the rope at 0:18 can be difficult. If you start your jump from the middle of the platform, you want to begin holding Left at the same time as you jump (or a couple frames afterwards). The further left on the platform you are, the longer you need to go neutral before holding Left. | ||
*The 2nd set of ropes can be tough to navigate quickly without getting hit. Find a comfortable way if you struggle doing Riz Ropes. | *The 2nd set of ropes can be tough to navigate quickly without getting hit. Find a comfortable way if you struggle doing Riz Ropes. | ||
| + | *If you get Right spawn for the last phase, the Necky can eat your roll if he get far enough left. Buffering your roll prevents this death. | ||
<div class="toccolours mw-collapsible mw-collapsed" style="width:600px"> | <div class="toccolours mw-collapsible mw-collapsed" style="width:600px"> | ||
| Line 31: | Line 33: | ||
*The Quick Left spawn methods are a bit risky, but you avoid waiting for the bird after grabbing the barrel. | *The Quick Left spawn methods are a bit risky, but you avoid waiting for the bird after grabbing the barrel. | ||
**For #1, hesitate a split second before jumping on the bird so you don't lose Diddy. | **For #1, hesitate a split second before jumping on the bird so you don't lose Diddy. | ||
| + | </div> | ||
| + | </div> | ||
| + | |||
| + | <div class="toccolours mw-collapsible mw-collapsed" style="width:600px"> | ||
| + | '''ALT ROPES''' | ||
| + | <div class="mw-collapsible-content">{{#ev:youtube|yNpfOb6gY_o|560||https://www.youtube.com/watch?v=yNpfOb6gY_o}} | ||
| + | *Alternative version of optimal ropes strats seen above. | ||
| + | *It's more forgiving since you can do a longer jump near the DKC barrel if you are unsure about your setup. [https://youtu.be/NKaRN2VaHl0 Click here for an example.] | ||
</div> | </div> | ||
</div> | </div> | ||
| Line 37: | Line 47: | ||
'''Left Left Mid'''{{#ev:youtube|6F86FH2gIic|560||https://www.youtube.com/watch?v=6F86FH2gIic}} | '''Left Left Mid'''{{#ev:youtube|6F86FH2gIic|560||https://www.youtube.com/watch?v=6F86FH2gIic}} | ||
*See MORE STRATS for quick left spawn strats with the 2nd phase. | *See MORE STRATS for quick left spawn strats with the 2nd phase. | ||
| + | |||
'''Left Mid Left'''{{#ev:youtube|r28iFplCC50|560||http://www.youtube.com/watch?v=r28iFplCC50}} | '''Left Mid Left'''{{#ev:youtube|r28iFplCC50|560||http://www.youtube.com/watch?v=r28iFplCC50}} | ||
Latest revision as of 10:10, 20 August 2021
 | |
| Game | Donkey Kong Country 2 |
|---|---|
| World name | Gloomy Gulch |
| Level name | Ghostly Grove |
| Previous level | Web Woods |
| Next level | Arctic Abyss |
Difficulty:
- Safe: 2/10
- Optimal: 7/10
Contents
Any%
Safe
Notes
- Every barrel spawn is random, so seconds can be lost on RNG in this fight. Mid Right Right is the best possible luck.
- The 2nd round is the most important in terms of RNG, since getting the infamous Left spawn is much slower.
- Standing at the higher platform for the fanfare saves ~2 frames over the lower platform. Save the frames!
Optimal
Mid Mid Right
Notes
- The most optimal luck is Mid Right Right. This video focuses on movement.
- Reaching the rope at 0:18 can be difficult. If you start your jump from the middle of the platform, you want to begin holding Left at the same time as you jump (or a couple frames afterwards). The further left on the platform you are, the longer you need to go neutral before holding Left.
- The 2nd set of ropes can be tough to navigate quickly without getting hit. Find a comfortable way if you struggle doing Riz Ropes.
- If you get Right spawn for the last phase, the Necky can eat your roll if he get far enough left. Buffering your roll prevents this death.
MORE STRATS
- If executed perfectly, Claude and V0oid ropes are the same speed as the ropes shown in the Optimal tape above, but they are much more difficult.
- The Quick Left spawn methods are a bit risky, but you avoid waiting for the bird after grabbing the barrel.
- For #1, hesitate a split second before jumping on the bird so you don't lose Diddy.
ALT ROPES
- Alternative version of optimal ropes strats seen above.
- It's more forgiving since you can do a longer jump near the DKC barrel if you are unsure about your setup. Click here for an example.
Other Luck
Left Left Mid
- See MORE STRATS for quick left spawn strats with the 2nd phase.
Left Mid Left
Right Right Right