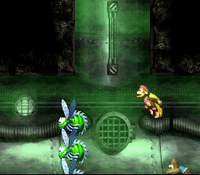
Difference between revisions of "Low-G Labyrinth"
m (1 revision imported) |
|||
| (11 intermediate revisions by 4 users not shown) | |||
| Line 7: | Line 7: | ||
| next = [[Kaos Karnage]] | | next = [[Kaos Karnage]] | ||
}} | }} | ||
| − | Difficulty: | + | Difficulty:<br> |
| − | <br> | + | *Safe: 4/10<br> |
| − | + | *Intermediate: 6/10<br> | |
| + | *Optimal: 9/10<br> | ||
==Any%== | ==Any%== | ||
| + | ====Safe==== | ||
{{#ev:youtube|sFi-Kat0O0g|560||http://www.youtube.com/watch?v=sFi-Kat0O0g}} | {{#ev:youtube|sFi-Kat0O0g|560||http://www.youtube.com/watch?v=sFi-Kat0O0g}} | ||
Notes: | Notes: | ||
| − | * | + | *The hit at 0:48 is intentional to put Kiddy in front. That way, even if you take damage going through the red bees at 1:14, you can still have a fast ending. |
| − | + | ====Intermediate==== | |
| − | == | + | {{#ev:youtube|222u5lOpNHg|560||http://www.youtube.com/watch?v=222u5lOpNHg}} |
| − | {{#ev:youtube| | ||
Notes: | Notes: | ||
| − | * | + | *This video showcases the Kiddy damage boost, which you can do if you keep both Kongs until the final section. If you take damage on the red bees and are forced to use Dixie for that section, refer to the ending of the Safe video instead. |
| − | * | + | ====Optimal==== |
| + | {{#ev:youtube|Nv_YiQg9M8o|560||http://www.youtube.com/watch?v=Nv_YiQg9M8o}} | ||
| + | *This route assumes you kept solo Dixie from the ending of 3-1 all the way until the beginning of this stage, allowing you to pick up the Kong at 0:48 as a bird and skip the DK Barrel freeze. | ||
| + | *[http://dkcspeedruns.com/DKC3_Tricks#Krimp_Just_Defend Krimp Just Defend] | ||
| + | *If you take damage going through the red bees at 1:10, you will be forced to do the ending as Kiddy and lose a lot of time. | ||
| + | *The wiggle at 1:26 helps setup Dixie to glide over 3 bees at once, saving about 1 second (J version only). | ||
| + | *Keep in mind there are two possible endings to this stage, depending on which version of the game you are playing on (J or U). | ||
| + | |||
| + | <div class="toccolours mw-collapsible mw-collapsed" style="width:600px"> | ||
| + | '''MORE STRATS''' | ||
| + | <div class="mw-collapsible-content">{{#ev:youtube|lpLfhsmTkTY|560||https://www.youtube.com/watch?v=lpLfhsmTkTY}} | ||
| + | (00:06) | ||
| + | *Releasing the jump button early as Dixie approaches these ledges can cause Dixie to skip the landing animation | ||
| + | (00:20) | ||
| + | *[http://dkcspeedruns.com/DKC3_Tricks#Krimp_Just_Defend Krimp Just Defend] | ||
| + | (00:30) | ||
| + | * Do not touch the walls during this roll | ||
| + | * Quickly move the d-pad left and right to avoid the wall and bees | ||
| + | *If Dixie touches the wall while rolling, she will get stuck and be unable to move until she jumps or lands | ||
| + | </div> | ||
| + | </div> | ||
| + | |||
| + | |||
| + | |||
| + | |||
[[Category:Low-G Labyrinth]] | [[Category:Low-G Labyrinth]] | ||
[[Category:Mekanos]] | [[Category:Mekanos]] | ||
Latest revision as of 06:26, 4 June 2022
 | |
| Game | Donkey Kong Country 3 |
|---|---|
| World name | Mekanos |
| Level name | Low-G Labyrinth |
| Previous level | Blazing Bazukas |
| Next level | Kaos Karnage |
Difficulty:
- Safe: 4/10
- Intermediate: 6/10
- Optimal: 9/10
Contents
Any%
Safe
Notes:
- The hit at 0:48 is intentional to put Kiddy in front. That way, even if you take damage going through the red bees at 1:14, you can still have a fast ending.
Intermediate
Notes:
- This video showcases the Kiddy damage boost, which you can do if you keep both Kongs until the final section. If you take damage on the red bees and are forced to use Dixie for that section, refer to the ending of the Safe video instead.
Optimal
- This route assumes you kept solo Dixie from the ending of 3-1 all the way until the beginning of this stage, allowing you to pick up the Kong at 0:48 as a bird and skip the DK Barrel freeze.
- Krimp Just Defend
- If you take damage going through the red bees at 1:10, you will be forced to do the ending as Kiddy and lose a lot of time.
- The wiggle at 1:26 helps setup Dixie to glide over 3 bees at once, saving about 1 second (J version only).
- Keep in mind there are two possible endings to this stage, depending on which version of the game you are playing on (J or U).
MORE STRATS
(00:06)
- Releasing the jump button early as Dixie approaches these ledges can cause Dixie to skip the landing animation
(00:20)
(00:30)
- Do not touch the walls during this roll
- Quickly move the d-pad left and right to avoid the wall and bees
- If Dixie touches the wall while rolling, she will get stuck and be unable to move until she jumps or lands